Here are the best Warframes every player should have. Combat effectiveness is a major factor, but overall usefulness in the wide variety of Warframe missions is the main consideration.
Also included are some general ratings on the effectiveness of that warframe in certain aspects. Those ratings are defined below:
Damage Rating
Damage Rating is a measurement of how much damage this warframe does. Damage can come from either direct damage or from buffs to party/weapon damage. Some examples of well known damage dealers are: Chroma, Mesa, Nova, and Saryn.
Defense Rating
Defense Rating a measurement of how difficult a warframe is to kill. This factors in a warframe’s ability to mitigate damage, heal themselves back up, or avoiding damage entirely. Some examples of well known defensive frames are: Inaros, Limbo, Nezha, Rhino, and Trinity.
Speed Rating
Speed Rating is a measurement of how fast a warframe moves through the mission. It also accounts for how good the warframe’s abilities are on the move. Some examples of warframes known for their speed are: Guass, Volt, and Zephyr.
Utility Rating
Utility Rating is a measurement of unique interactions that the warframe brings and the general usefulness of those interactions. Warframes with good utility will often be able to crowd control large groups of enemies in some way or give buffs to their team. Some examples of well known utility warframes are: Nekros, Octavia, Vauban, and Wisp.
Ease of Use Rating
Ease of Use Rating is a measurement of how simple the warframe is to use effectively. Easy to use warframes don’t require a lot of setup, knowledge, or skill to work well. Some examples of well known easy to use warframes are: Excalibur, Frost, and Rhino.
Letter Grades Explained
- A – Among the best in the game
- B – Better than the average warframe
- C – Average compared to other warframes
- D – Worse than the average warframe
- F – Among the worst in the game
10. Rhino – Simple But Effective
Role: Tank & Party Buffer
You’ll see many new players running around as Rhino. He is often the first frame people go for due to his effective simplicity and early accessibility. Don’t let his ease of play trick you into thinking he’s just for new players though, Rhino is a great frame to have ready to go even in endgame content.
| Damage | Defense | Speed | Utility | Ease of Use |
|---|---|---|---|---|
| B | A | B | C | A |
Rhino is an unstoppable force. While he has Iron Skin (#2) up, he shrugs off almost every hit that comes his way. Status Effects and Knockdowns don’t effect Rhino while Iron Skin is up. This makes Rhino extremely effective at running straight to objectives, ignoring enemies, traps, lasers, and anything else that would try to slow him down. He is a great choice for running Spy mission missions (once you know how to get to each terminal) without all the hassle of sneaking around. With his Arcane Helmet, he is also actually one of the fastest sprinters in the game.
His other notable ability is Roar (#3). This gives a flat damage boost to all allies within range. While a bit boring, this ability is actually one of the best options to put on other frames through the Helminth system. The fact that other frames can use this ability too does diminish the usefulness of Rhino, but he is still a great addition to your collection and a welcome member of any party.
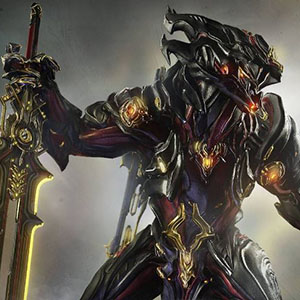
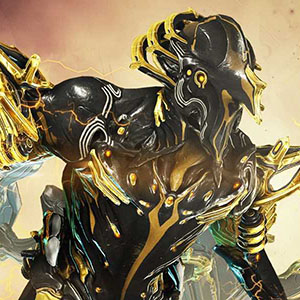
9. Chroma – Endgame Damage Scaling & Double Credits
Role: Boss Killer
Most endgame boss guides you’ll find will use Chroma, and for good reason. Chroma is one of the few frames that buffs weapon damage. If done correctly, he can scale his weapon damage up to ridiculous levels. The best part is that the damage buff actually scales off how much health you have, so Chroma gains damage from modding into health, making him quite hard to kill when matched with his abilities. And to top it all off, once you kill the boss, Chroma can double the Credits you receive.
| Damage | Defense | Speed | Utility | Ease of Use |
|---|---|---|---|---|
| A | B | C | B | D |
Vex Armor (#3) converts incoming damage on Shields to an Armor buff, and incoming damage on Health to a weapon damage buff. These buffs are additive, meaning that the multiplicative percent increase mods gain even more benefit with Vex Armor. The game plan for Chroma is to soak most of the damage the boss and adds deal, turning it into weapon damage back on the boss.
Chroma also has the unique ability to double the amount of credits earned. Effigy (#4) drops his armor on the ground, giving buffs to his allies, damaging his enemies, and increasing his speed. While Effigy is up, nearby allies earn double credits. It’s like Chroma was made to kill bosses like Exploiter Orb, who drop a huge amount of credits on kill.
8. Nova – All Enemies Take Double Damage
Role: Enemy Debuffer & AoE Damage
Nova is an amazing DPS frame. She effectively doubles the team’s damage while being able to put out massive damage spikes. She also has access to a great movement ability for her and her team, moving across large distances quickly.
| Damage | Defense | Speed | Utility | Ease of Use |
|---|---|---|---|---|
| A | D | A | B | C |
She is best known for Molecular Prime (#4). This ability puts a debuff on all effected enemies that doubles the amount of damage they take. On top of that, Molecular Prime can also slow down enemies or speed them up, depending on how you mod her. “Slowva” is great in situations where your enemies are a threat, as it reduces not only their movement speed, but their attack speed as well. “Speedva” is great in scenarios where waves of weak enemies move slowly toward you, speeding up the process.
Nova’s other damage ability of interest is Antimatter Drop (#2). This ability launches a slow moving projectile that follows your aim and absorbs all the damage you fire into it. Once it makes contact with something, that absorbed damage explodes out with a substantial modifier, leading to one of the strongest single hits possible in the game.
Finally, Nova can create Worm Holes (#3) that blink her forward in the direction she is looking. After she casts this ability, her allies can follow her into the newly created portal to be teleported as well. If modded correctly, Nova can cover long distances faster than any other frame.

7. Limbo – True Invulnerability
Role: Objective Defender
Limbo is easily the most unique frame in the game. Though daunting at first, his Rift system is relatively easy to use and extremely effective at certain tasks. If you play with newer players, you may need to give them a brief overview of the system though.
| Damage | Defense | Speed | Utility | Ease of Use |
|---|---|---|---|---|
| C | A | C | A | D |
There are two planes of existence in the eyes of Limbo, the Material Plane and the Rift Plane. Entities inside the Material Plane cannot interact with entities in the Rift Plane and vice versa (other than a few exceptions). Limbo can take himself, his allies, his enemies, and even objectives into the Rift. That means that if played correctly, Limbo can keep his team and the objective in the Rift while the enemies are rendered useless in the Material (or vice-versa).
Enemies that are in the Rift Plane through Limbo’s abilities can be frozen in place using Statsis (#2). This applies retroactively to enemies entering the Rift during the duration, effectively stunning any enemy that has the ability to damage Limbo or his allies inside the Rift. So, when played correctly, Limbo puts enemies into one of two scenarios: outside the Rift and unable to interact with Limbo, or inside the Rift and stunned.
As the master of the Rift Plane, Limbo can move freely between it and the Material Plane simply by dodge rolling. This will also leave behind a portal for your team to enter the Rift Plane, but only for a short time. Since Limbo can stay in the Rift Plane indefinitely, he can essentially become immune to everything, as long as he doesn’t bring his enemies into the Rift with him.
6. Volt – Speed and Aggression
Role: Team Buffer OR AoE Damage
Despite being one of the frames new players can pick at the very start of the game, Volt fills multiple important roles in the Warframe meta. He’s the best frame for speeding up his whole team, leading to faster mission completion. He has a powerful (though energy intensive) area of effect ability. Finally, he is one of the only ways in the game to increase damage dealt to certain bosses like an Eidolon’s shields.
| Damage | Defense | Speed | Utility | Ease of Use |
|---|---|---|---|---|
| A | C | A | B | B |
Speed (#2) can give your party such a huge speed buff that it can often be TOO much speed. The tight corridors of most tile sets don’t lead themselves well to the amount of speed Volt can give to his team. However, on the more open tiles, or with a lot of practice, Volt will greatly reduce your overall mission time on point to point missions like Capture or Sabotage.
Discharge (#4) not only deals immense damage in a huge area, it also stuns affected enemies. The only real downside is the high energy cost for the Ability Power modded version. With a good battery like a Trinity or a lot of Energy consumables, Volt can clear multiple rooms with ease.
Warframe has always had an issue in boss design with the difference in player power between a newer player and a Riven kitted veteran. To fix this issue, they added a system that is easier to balance as it puts players mostly on the same level of damage. This system will likely be utilized going forward for future bosses and content. Volt’s Electric Shield (#3) bypasses this balance. With a Volt on your team, you can phase certain bosses faster than the developers intended.
5. Wisp – Everyone’s Favorite Buffer
Role: Team Buffer
Wisp is a damage, maneuverability, and survivability multiplier for your whole team. Wisp is a great choice if you are in a team setting with friends or even randoms. Everyone appreciates Wisp’s buffs.
| Damage | Defense | Speed | Utility | Ease of Use |
|---|---|---|---|---|
| B | B | B | A | B |
Reservoirs (#1) put down three great buffs for your whole team to pick up. Vitality gives a buff to max health and health regeneration. Haste increases movement, melee attack, and weapon fire speed. Shock delivers a pulsing area of effect that has a 100% Electricity proc, damaging and stunning nearby enemies.
Wisp’s other abilities aren’t much to write home about; not bad, but not great either. Wisp is one of those frames that doesn’t feel like it’s doing much, when in reality she’s likely the biggest contributor to team success. Keep your Reservoirs down in a place where your team can refresh them and they’ll love you for it.
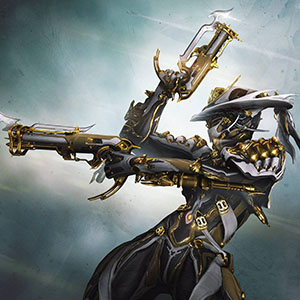
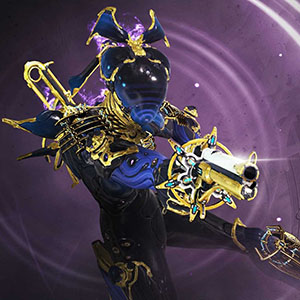
4. Mesa – Everything in Sight is Dead
Role: Conal Damage
Mesa is a one trick pony, but that one trick is killing enemies, and Mesa is very good at killing enemies. Her Peacemaker (#4) ability equips her extremely powerful Regulator pistols. With the right build, these pistols will shred through every enemy in sight.
| Damage | Defense | Speed | Utility | Ease of Use |
|---|---|---|---|---|
| A | B | C | C | A |
One of the best things about Peacemaker is that you don’t even really have to aim. To shoot, all you need to do is have an enemy within your targeting reticle and hold down the fire button. The more shots Mesa gets during Peacemaker, the more attack speed she gets, ramping damage on those targets that can survive a few hits. The Regulator pistols don’t have ammo or a reload; you’re only limited by energy.
While Mesa’s weakness is that she is generally quite squishy, dying quickly to sustain damage, she has some decent abilities to mitigate damage. Shatter Shield (#3) and Shooting Gallery (#2) will greatly reduce incoming bullet damage from any enemies that you haven’t mowed over with Peacemaker yet. Just make sure to keep your distance from melee enemies and status procs.
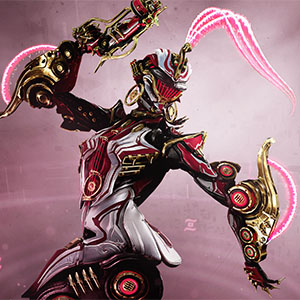
3. Octavia – A Symphony of Stealth & Scaling Damage
Role: Team Buffer & Turret Placer
Octavia is the master of two important aspects of the game. She can keep not only herself, but her whole team, stealthed forever. This form of stealth allows you to fire weapons, melee attack, sprint, and parkour without enemies being able to see you or retaliate. She also has access to an ability that turns enemies damage against them, scaling extremely quickly against powerful foes.
| Damage | Defense | Speed | Utility | Ease of Use |
|---|---|---|---|---|
| A | A | C | A | C |
Metronome (#3) allows Octavia and her team to gain multiple buffs for doing different things on beat with her song. The most impactful of those buffs is invisibility. By crouching on beat, players can gain a long lasting stealth buff that is not removed through combat, meaning you can kill enemies without them being able to retaliate. Once you get a feel for it, you can maintain this buff indefinitely with minimal energy invested.
Mallet (#1) gives enemies a target to hit while Octavia and her team are invisible. It has infinite health, absorbing every hit made against it. Damage done to it increases an internal counter. The Mallet continuously damages all enemies around it based on how high that counter is. Even the most powerful enemies will kill themselves in seconds. The more enemies there are and the more damage they deal, the more damage Mallet does. You can even have it chase after enemies by pairing it with Resonator (#2).

2. Saryn – The All-Around Damage Dealer
Role: AoE Damage Over Time & Combo Counter Ramping
Saryn is the perfect mix of area of effect and single target damage with surprisingly effective survivability. With no real weaknesses, she is the perfect go to frame for general endgame content, such as Steel Path or Sorties.
| Damage | Defense | Speed | Utility | Ease of Use |
|---|---|---|---|---|
| A | A | C | B | B |
Her AoE ability, Spores (#1), is what most people know Saryn for. Spores last forever once on a target, nearly guaranteeing that once an enemy is affected, they will eventually die. Spores spread quickly and easily, dealing more damage and Corrosive procs the longer that enemies are able to survive. This means that harder to kill enemies will ramp the damage higher and higher until even they succumb. Toxic Lash (#3) makes every hit against an enemy with Spores spread them to nearby foes. Matched with AoE fast hitting weapons like Ignis and with proper management of Miasma (#4), your Spores will never drop off.
Saryn’s single target damage comes from her ability to increase the melee Combo Counter extremely quickly. Every Spore popped with a melee attack contributes to the Combo Counter, quickly ramping your melee weapon damage through mods like Blood Rush. This means that Saryn can effectively increase her Combo Counter gain by up to 400% more than other frames.
In addition to her tremendous damage potential, she has access to a great defensive ability. Molt (#2) distracts enemies, removes debuffs, and (when augmented) heals her back up. It can also be used to draw fire away from teammates or objectives.

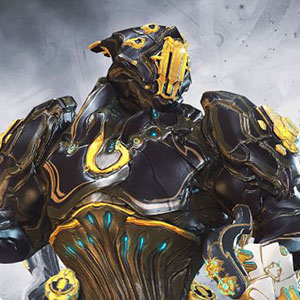
1. Nekros – Increase the Loot, Decrease the Grind
Role: Loot Creation & Health/Energy Battery
Veterans of the game know that eventually you will reach a point where combat effectiveness is not your top priority. Warframe encourages players to craft as many weapons and warframes as possible to level up their Mastery Rating. The endgame of Warframe really does come down to farming materials, mods, experience, and other loot.
With his ability to produce extra loot, Nekros reduces the amount of grinding you will need to do. If you don’t need a specific frame for the content you are doing, Nekros should be your default choice.
| Damage | Defense | Speed | Utility | Ease of Use |
|---|---|---|---|---|
| B | A | C | A | A |
There are a few warframes that can increase the rate at which you farm loot, but by far the best is Nekros. His ability Desecrate (#3), when modded properly, will easily increase all loot you earn by over 50%. This ability has a chance to force corpses to produce loot again. This boost is further increased by bringing weapons with high slash damage to turn single corpses into multiple, allowing Desecrate to re-roll each.
Desecrate also produces an increase in the number of Energy and Health Orbs spawned for your team, making him a pseudo healer and a battery for energy starved teammates. Desecrate is considerably easier to use than the other abilities that produce extra loot. With a good Despoil build, you’ll have no issue re-rolling every corpse.
Despite being the best warframe for increasing loot, Nekros is no pushover in combat either. Shadows of the Dead (#4) scales with enemy level, producing tougher shadows when you need them most. With its augment, Shield of Shadows, Nekros can maintain a near permanent 90% damage reduction.
Leave a Reply