Can Kanbei bridge the gap before you can build your best defense?
Mission Strategy
Similar to the previous mission, Kanbei has made a error in his tactics. While he has the superior forces, he does not have the ability to create new units. If you can hold the line against his forces, you can eventually overcome him with the use of your Bases.
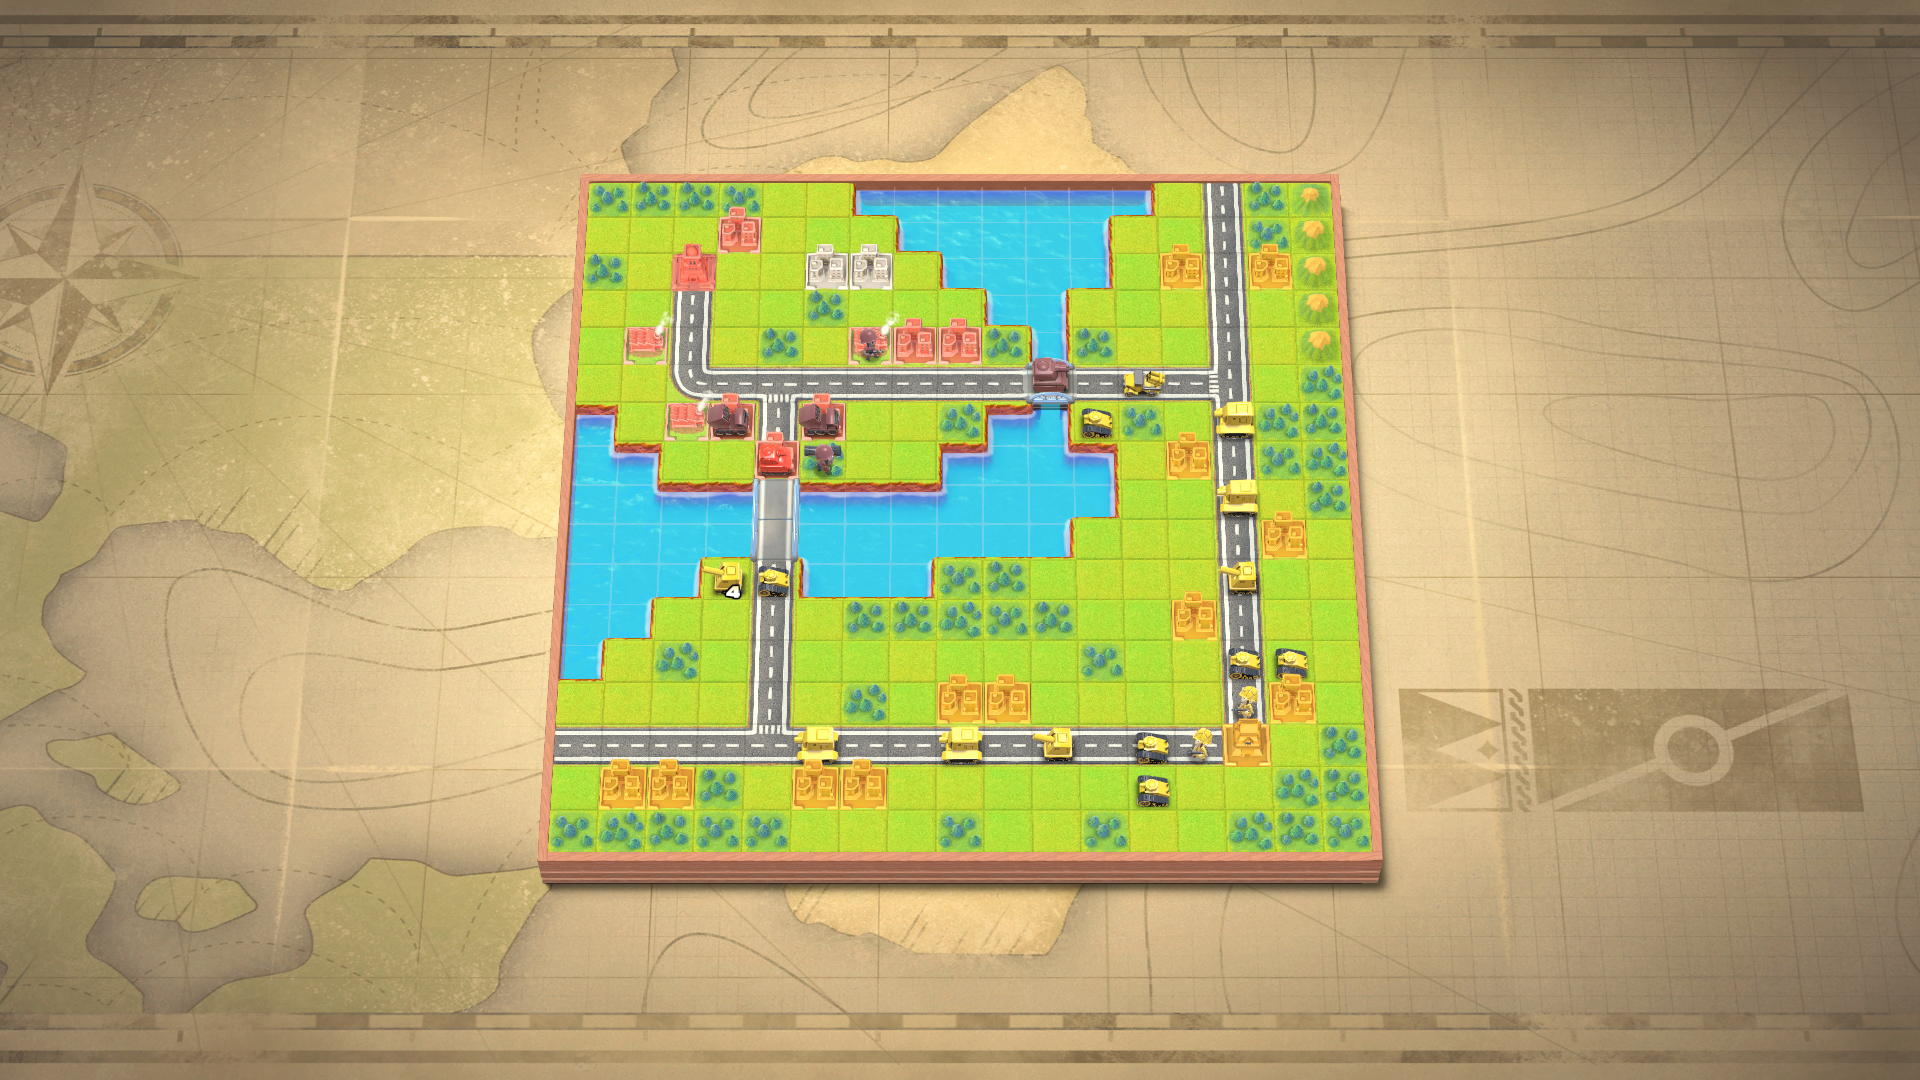
Also similar to the previous mission, this map has two chokepoints. The AI is not good at moving units out of the way for stronger units, so you can get them all to stack up for your indirect-fire units.
- Speed Goal: 7
- Power Goal: 4
- Technique Goal: ?
HQ Capture: While it doesn’t seem to be viable at first, HQ capture is actually a good strategy on this map. If you muster all of your forces to one side and clear a path for an APC, you can get to Kanbei’s HQ relatively quickly. His forces on the other front won’t move to attack your APC rush unless they are in range.
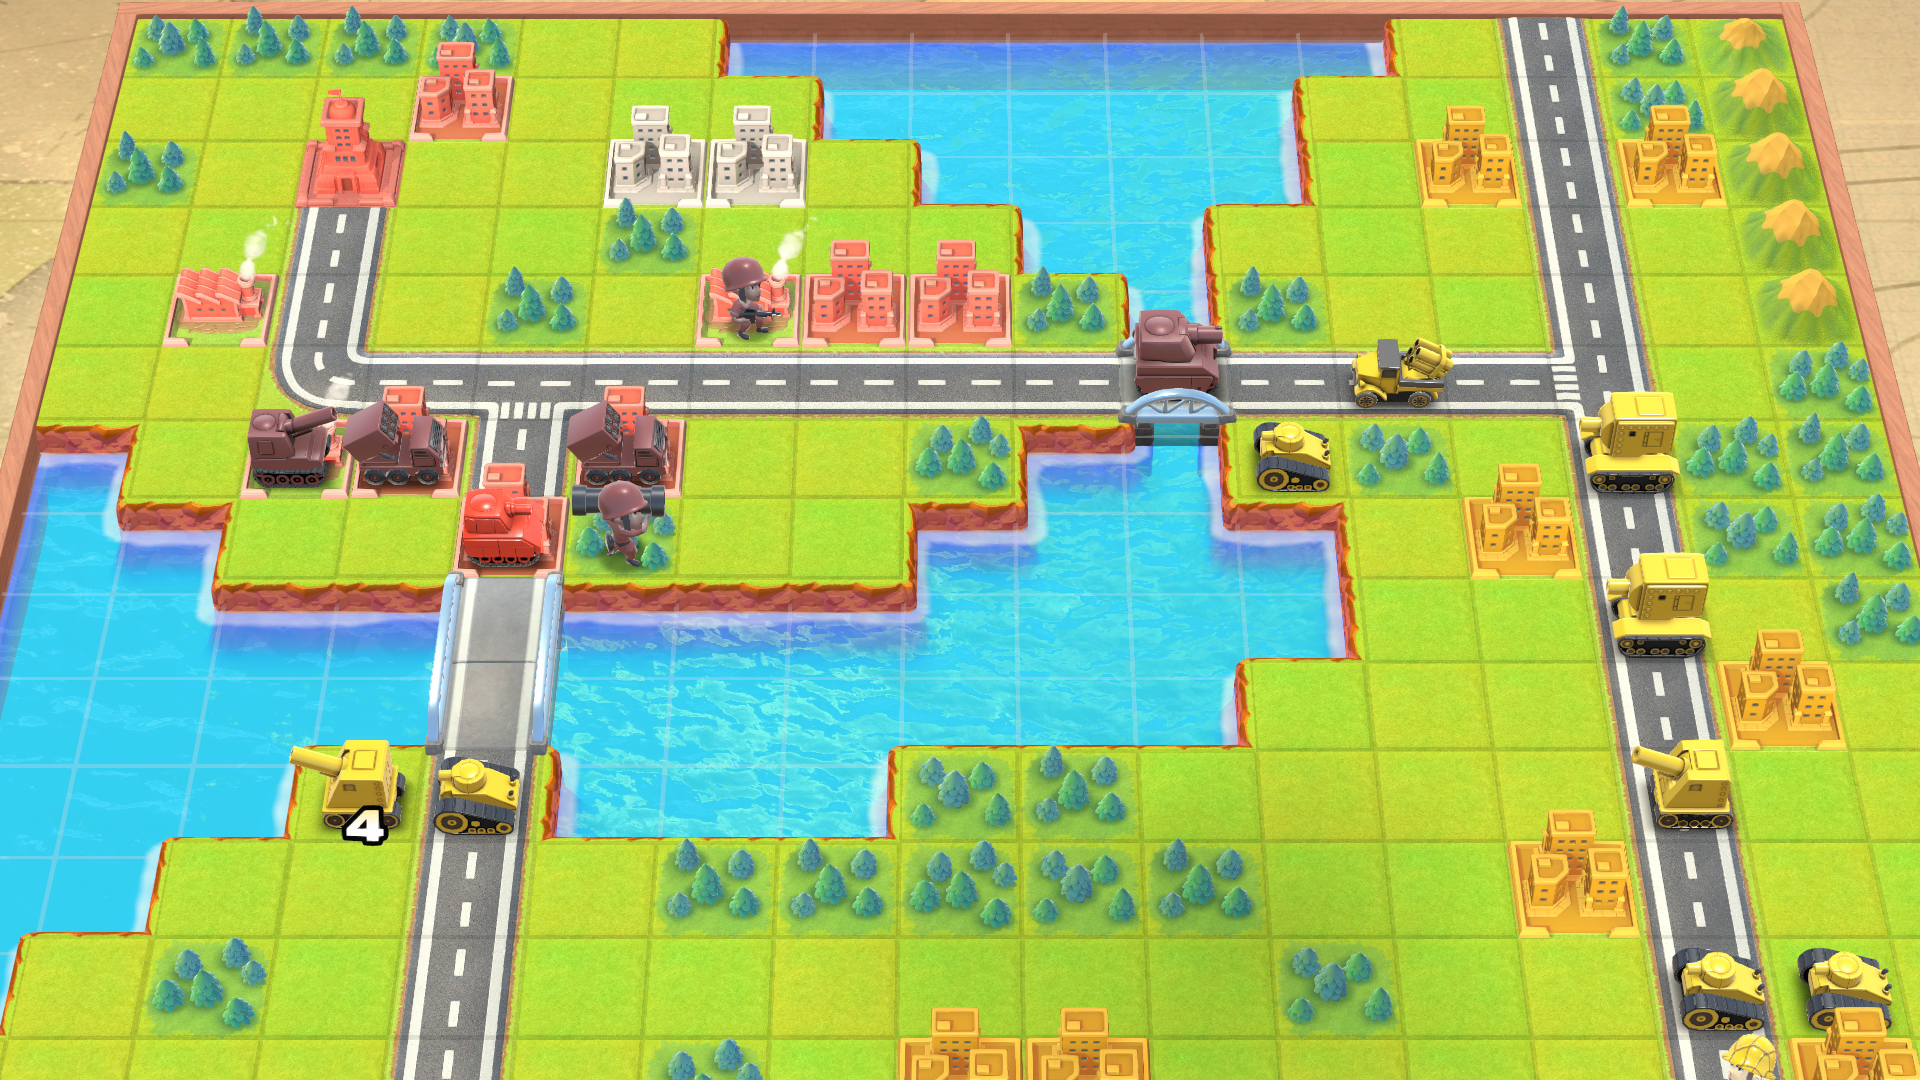
I found the south side to be easier to break through, as Kanbei will send most of his forces east, as long as you keep a unit on the bridge. If you move your Medium Tank west from it’s starting position on Day 1, you can get Kanbei to redirect some of his forces to the south instead of east.
Defeat All Enemies: This is the more straightforward strategy for this map. Generally, you’ll want to keep a Tank or Medium Tank positioned to block both Bridges. Kanbei will mass his forces in front of this wall, making them sitting ducks for your indirect-fire units.
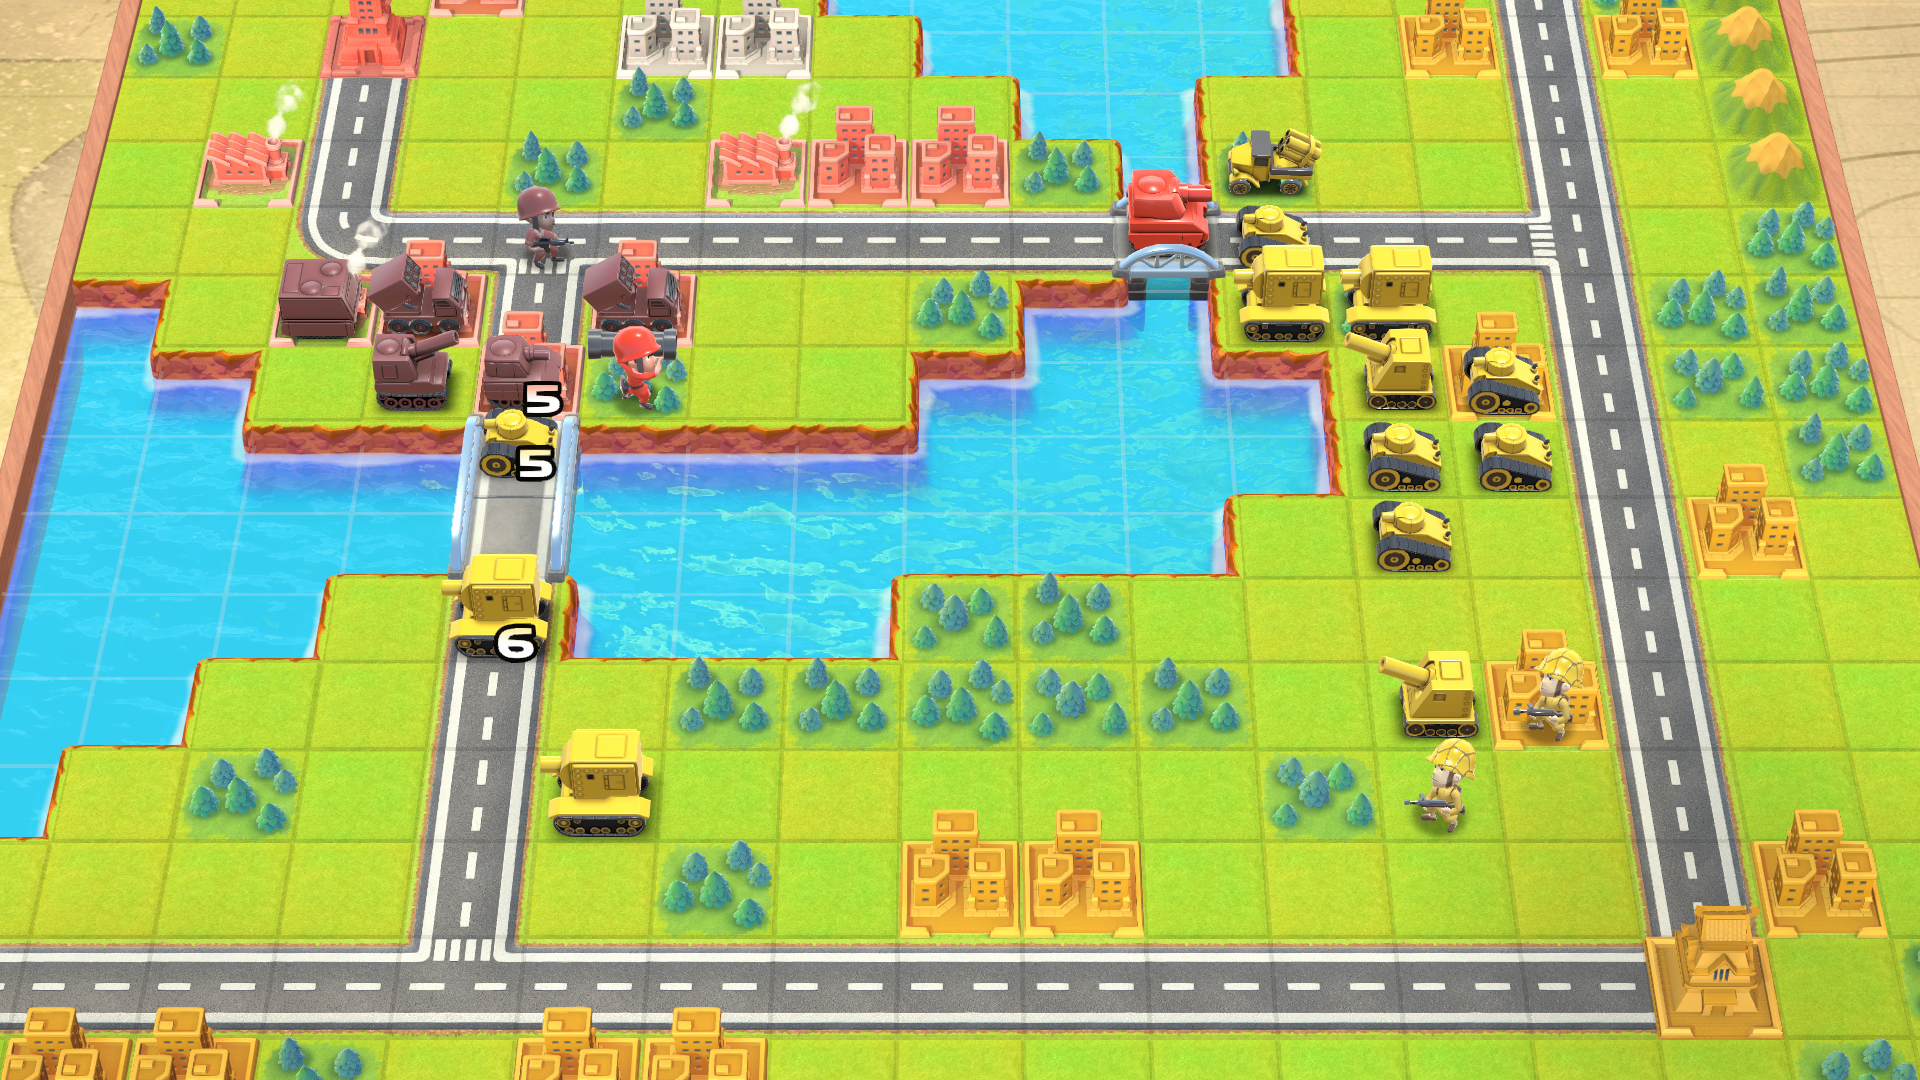
To maximize efficiency of this strategy, you’ll need to know how the AI makes decisions. The most important thing to know is that if an enemy unit is at 2 or fewer health, the AI will attempt to retreat it to one of their nearby Cities to repair it. If an enemy is at 3 or more health, it will not retreat.
The AI also does calculations on how much damage it will deal vs how much damage it will take when trying to decide if it will attack or not. However, deciding not to attack does not stop it from moving the unit into position. If you have an enemy Tank that is too low for the AI to consider attacking your Medium Tank, it will still move that Tank right in front of your Medium Tank. This stops the enemy Medium Tanks and other high health Tanks from attacking you.
So, if you have an enemy Tank at about 3-4 health blocking the way for the rest of the enemy forces, leave it there and attack the other enemy units with indirect attacks.
Turn by Turn Walkthrough
- Pick Andy as your CO
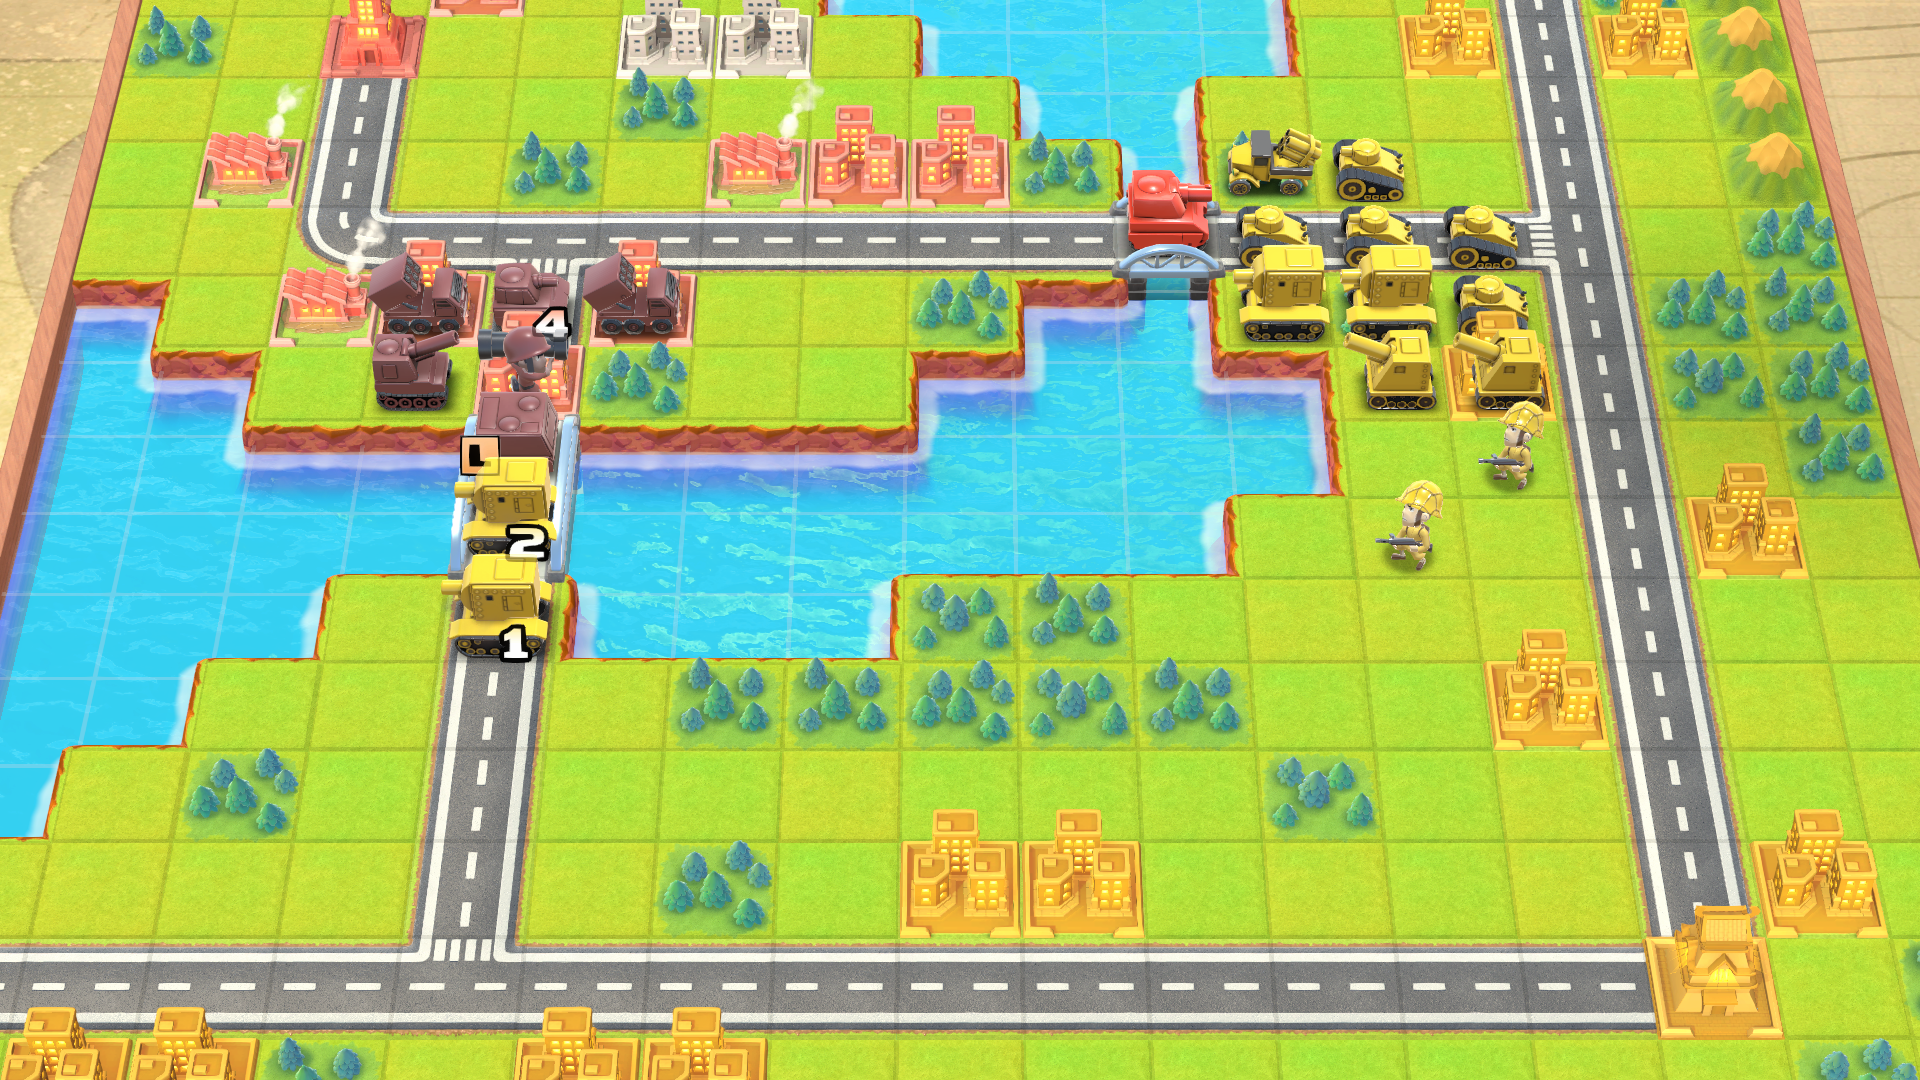
Day 1
- Attack the enemy Artillery with your west Rockets
- Move your Medium Tank one space east onto the bridge
- Advance your other Rockets, Mech, and Infantry
- Build an Artillery at your south Base
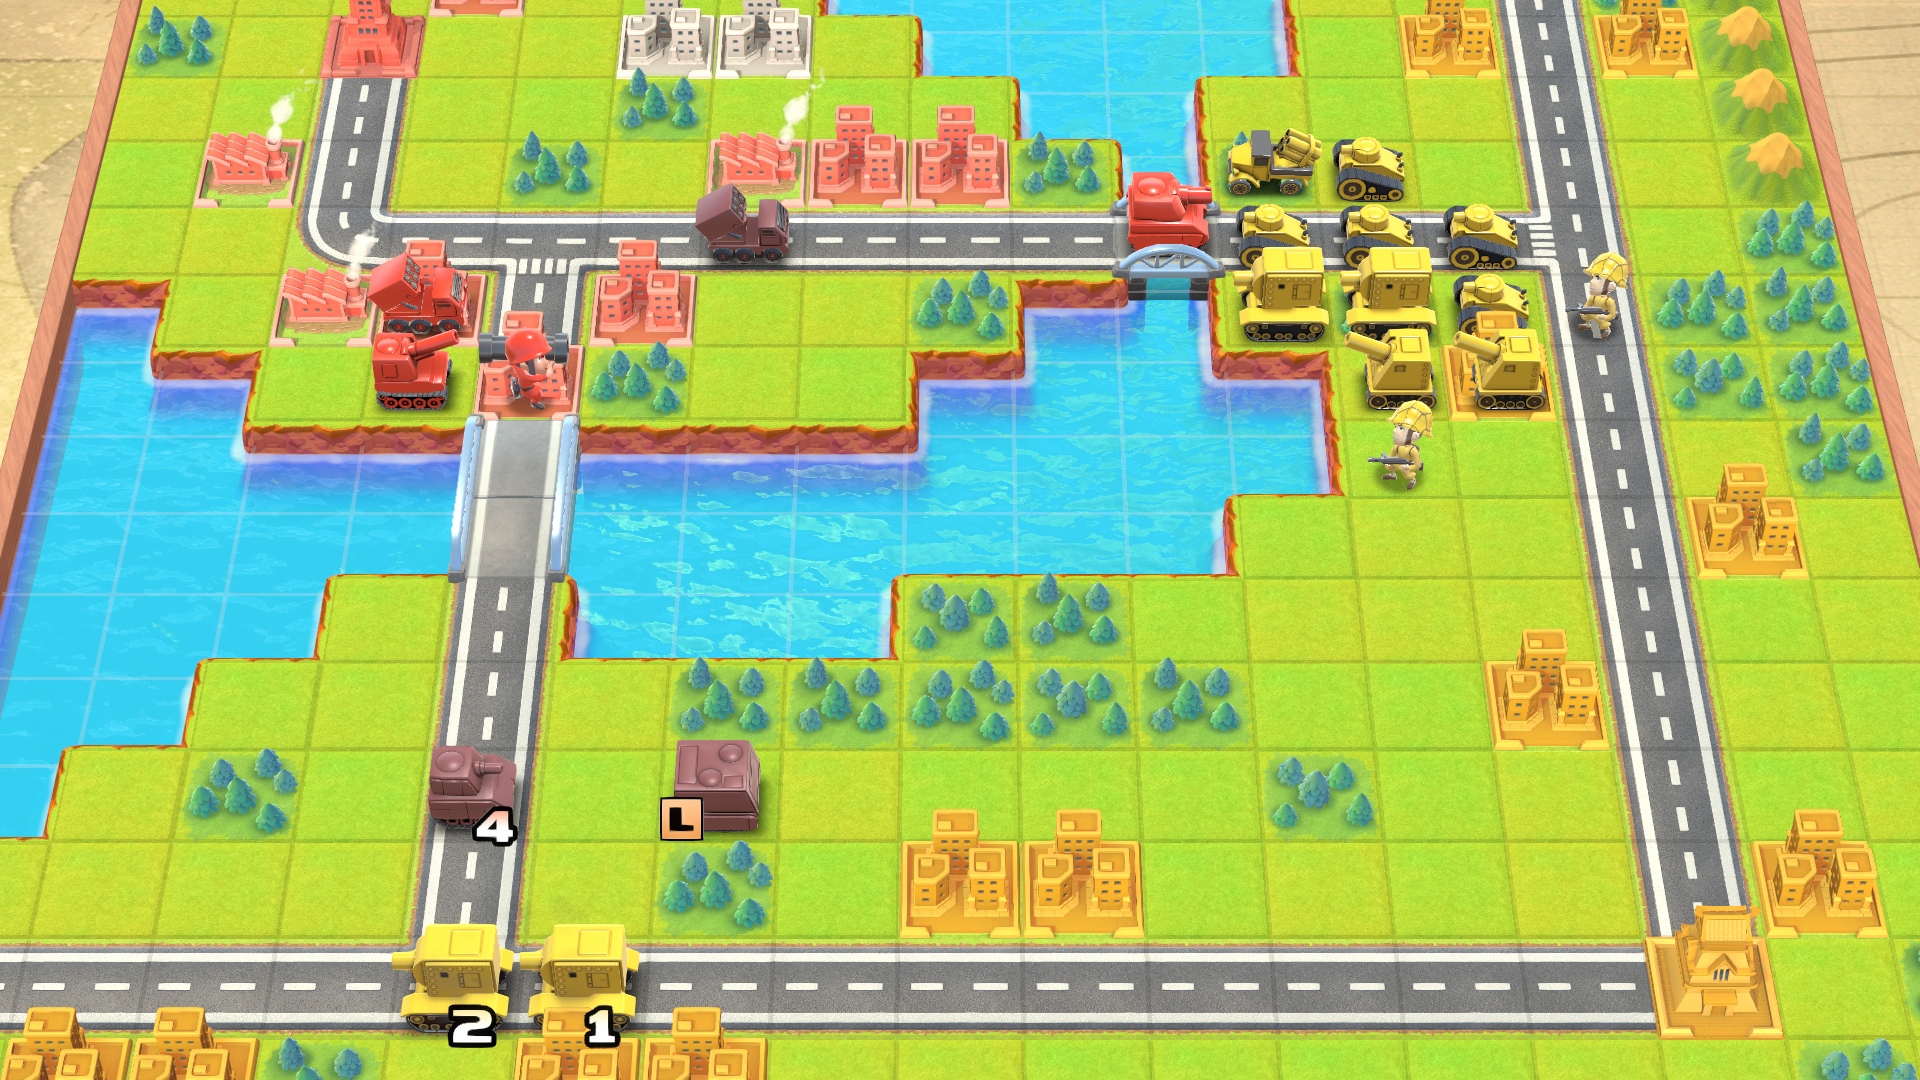
Day 2
- Destroy the enemy Artillery with one of your Rockets
- Attack the enemy Medium Tank with your other Rockets
- Attack the enemy Tank with your Tank
- Advance your Artillery and Infantry
- Build an APC at your south Base
Day 3
- Attack the enemy Medium Tank with your Artillery
- Attack both enemy Medium Tanks with your Rockets
- Weaken them, do not destroy, to make them retreat
- Retreat your Tank
- Destroy the enemy Tank with your Mech
- Advance your APC
- Load your infantry into your APC
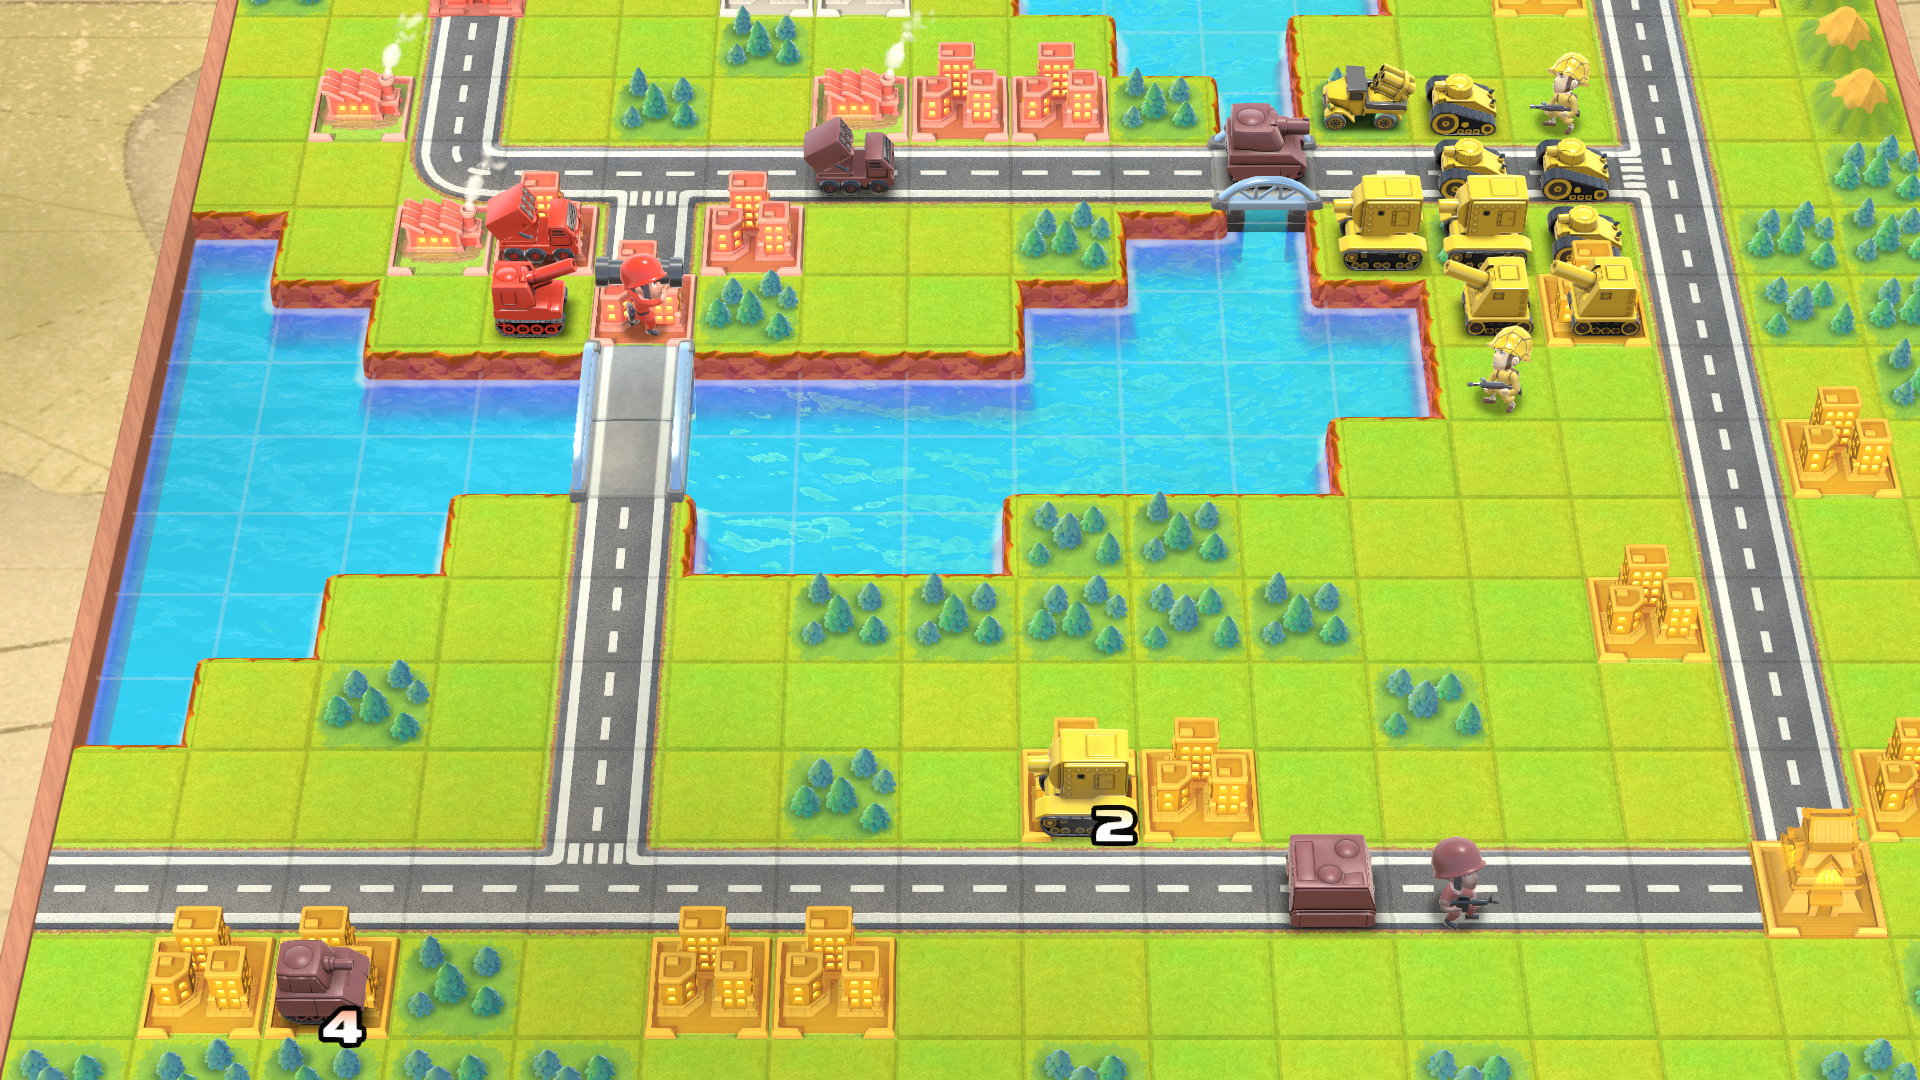
Day 4
- Advance your APC
- Advance your Tank and Rockets
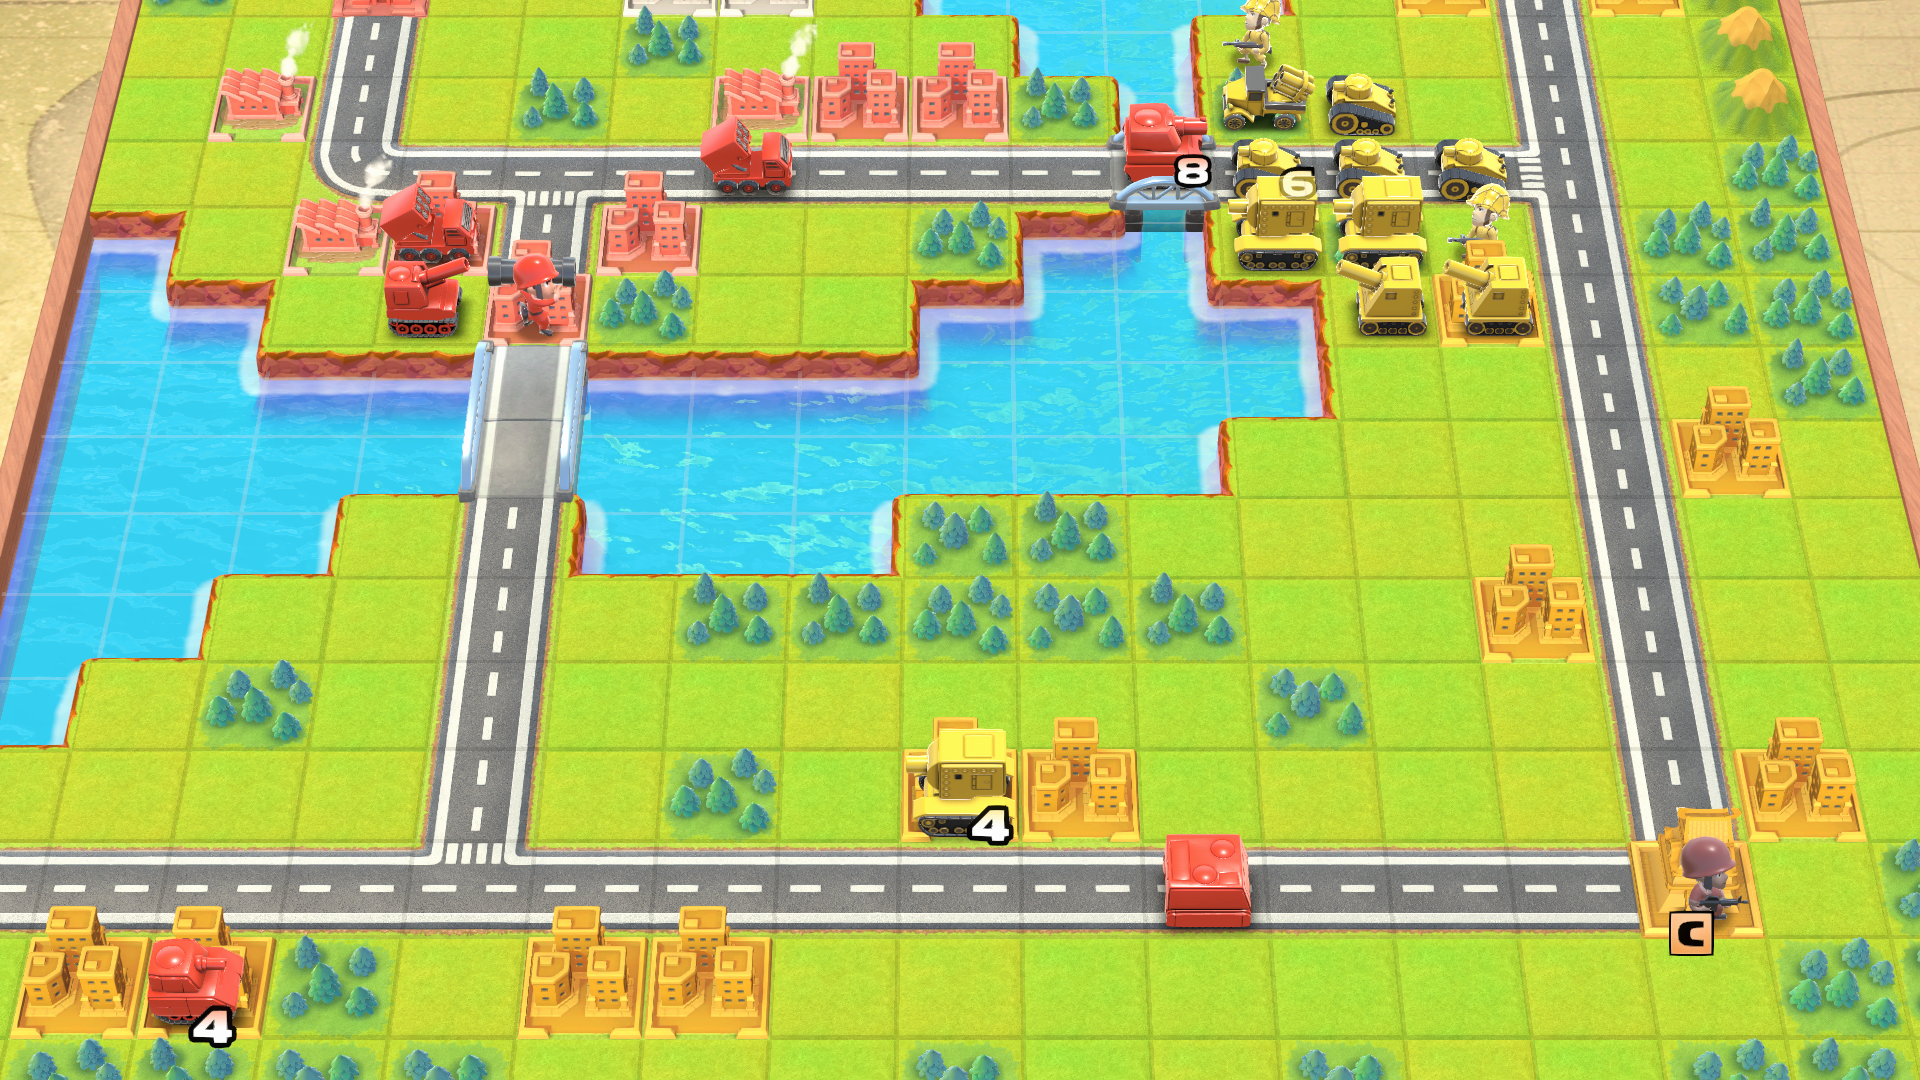
Day 5
- Destroy the 1 health enemy Medium Tank with your Tank (for Power Rating)
- Attack the enemy Tank with your Rockets
- Destroy the enemy Tank with your Medium Tank (for Power Rating)
- Advance your APC, dropping your Infantry toward the enemy HQ
Day 6
- Start capturing the enemy HQ with your Infantry
Day 7

- Finish capturing the enemy HQ

Leave a Reply