Trains are an extremely powerful resource for moving items and fluids over long distances automatically. While they are more complicated and expensive than other options, they are well worth the investment.
Trains in Satisfactory are a subject that you can invest a lot of time into. There is almost always a way to improve throughput and efficiency of your train infrastructure. However, we’ll start by learning how they work.
This page will focus the concepts of Trains and teach you enough to use them effectively to augment your factory.
Table of Contents
Train Usage
The main use for Trains is transporting materials over long distances. Because they take up a large amount of space and take a bit of time to accelerate, they are not as useful over short distances. Trains can haul both Items and Liquids, meaning they can carry almost anything that you would want to transport.
Once set up, the system is almost entirely automated. The general loop is:
- Materials go into Freight Platforms using Conveyor Belts or Pipes
- Materials are loaded into Freight Cars
- A Locomotive moves the Freight Cars along the Train Track
- The Train arrives at the other Train Station
- Materials are unloaded out of the Freight Cars
- Materials are extracted from the Freight Platforms using Conveyor Belts or Pipes
Picking The Right Spot
Trains take up a LOT of space. Since the map of Satisfactory is quite large, don’t be afraid to designate a large amount of space to your Train system. This will help you troubleshoot issues and expand your rails without the need for extensive reworks later.

You will also want a mostly flat area (entirely flat if possible). If there is no suitable area nearby, consider raising your train infrastructure high enough in the air with Foundations to create a flat base for your Trains.
I do not suggest building any Train infrastructure directly on the ground; you should always use foundations, even if they are close to the ground. Trains are tough enough as it is to set up – don’t make it harder for yourself with uneven ground.
Train Track
Train Track is the basic structure for determining where a train can go. It is built in segments that have both a minimum and maximum length. Segments can be chained together, meaning Train Tracks can continue on as far as you need it to.
Thinking of track as many individual segments will help you understand Signaling, which is likely the toughest part for a new Train Engineer to grasp.
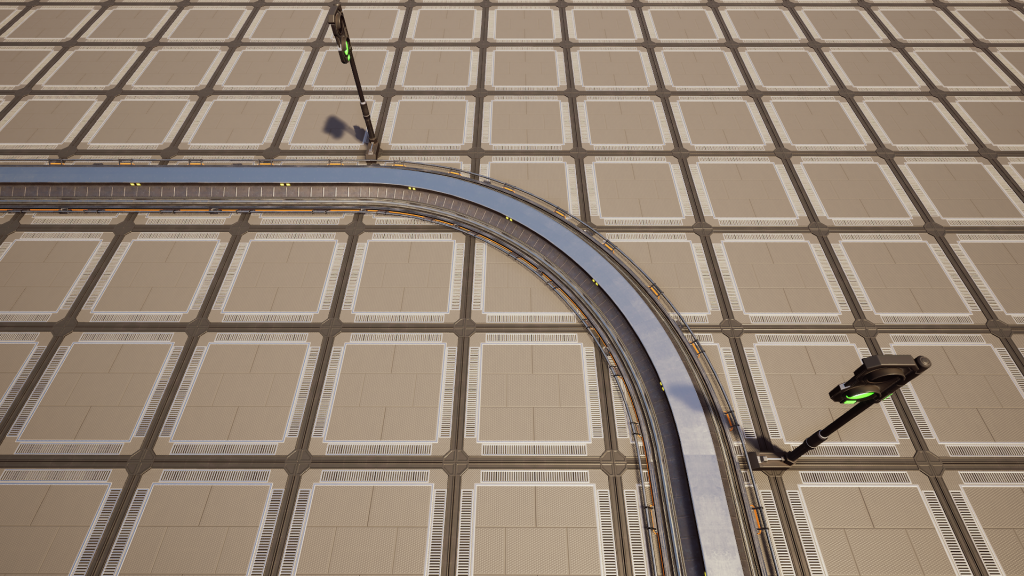
Turns
Track segments can turn, but there is a maximum angle for which a turn is allowed. In general, there is a ‘rule of three (3)’ for multiple limits relating to Train Tracks, especially turns.
Turn: 90 Degrees
A 90 degree turn can be built over 3 foundations of length. This is not only easy to remember, but will also keep your track centered on your Foundations before and after the turn.
90 degree turns can be directly chained together to make 180 and 270 degree turns as well if needed.
Turn: S-Bend
You can also make S-Bends with track. They are essentially two 45 degree turns in opposite directions. These are useful when you want to move a small distance to the left or right to avoid an obstacle or rough/uneven terrain.
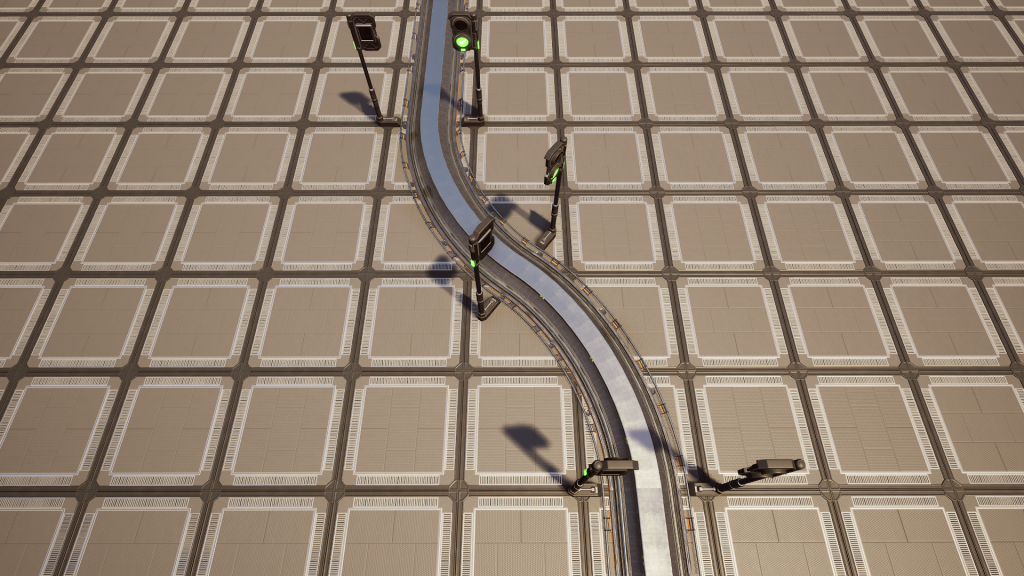
This simple S-Bend that will work for most of your needs covers 3 foundations: the starting and ending Foundation and a central Foundation. Like the 90 degree turn, this will keep your track centered on your Foundations.
You can many types of turns other than multiples of 45 if you need to, but try to stick with these basic turns if possible. Remember that connected Foundations can only be built in cardinal directions of each other. if your track starts making to weird turns, your Foundations will have a hard time following it.
Slopes
Train Tracks can also slope up or down. Making vertical changes to track requires a good amount of space, so only do it when you need to.
Track can only be built on slopes of 2 or 1 meter Foundations. 4 meter sloped Foundations will not allow track to be built on them.
The easiest (and best looking) way to accomplish a track slope is to start and end with a short segment. Either 1.5 or 2 Foundations, whichever looks nicer to you. Start the sloped track segment 1 flat Foundation before, and end it 0.5 (or 1) foundations into the slope.
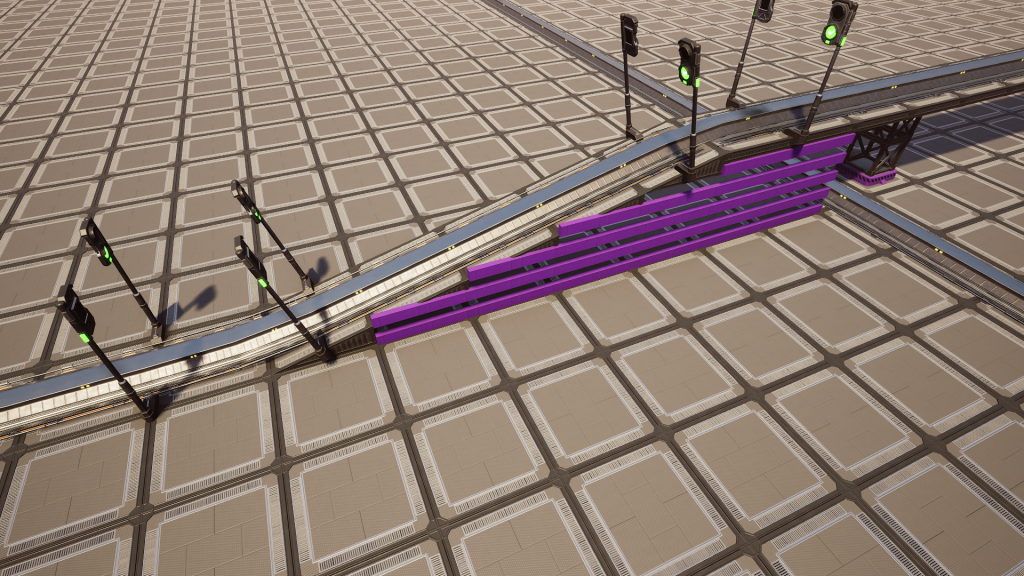
From there, build a straight track along the sloped Foundations until you reach the desired height. Finish the slope with an inverse of the start: 0.5 (or 1) sloped Foundations before the end of the slope to 1 flat Foundation after the slope.
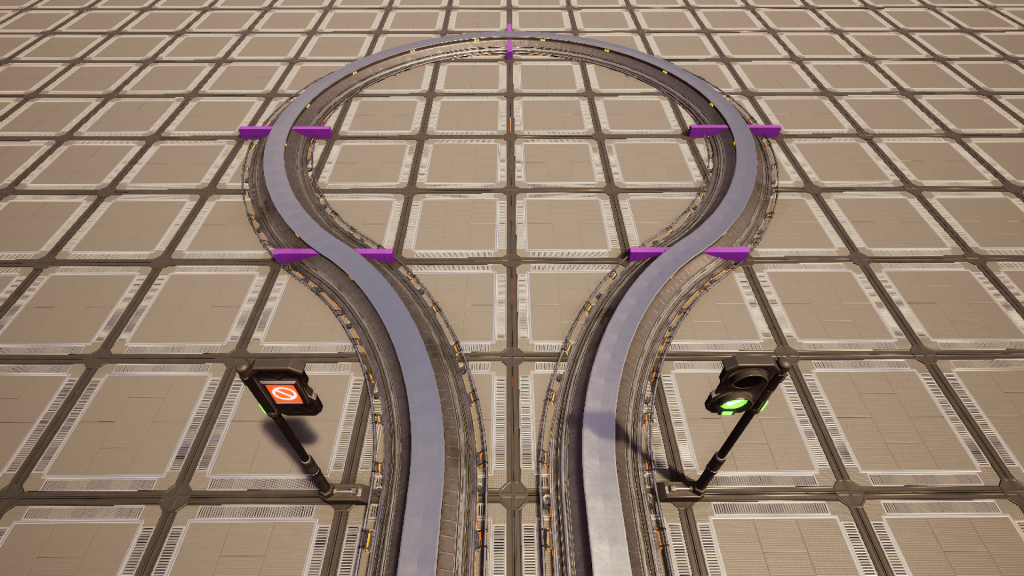
Junctions & Switches
Track can split, allowing multiple paths to utilize the same track segments. These junctions create complexity, but can also greatly increase efficiency.
A split track creates a Railroad Control Switch, which allows you to determine the direction of travel when driving a Locomotive manually. Trains with Auto Pilot enabled will chose their own path, regardless of the control switch direction.
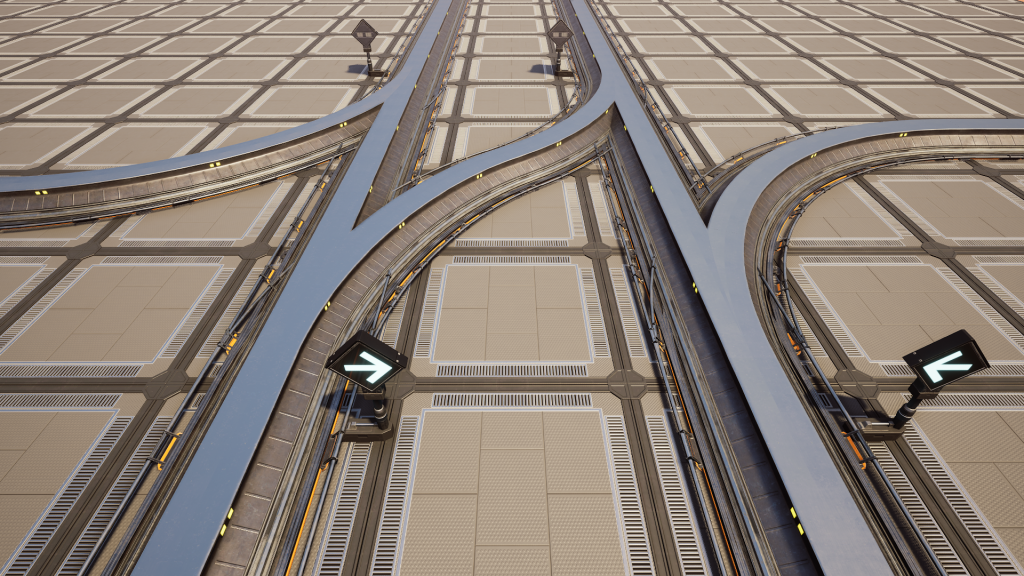
To build a junction, build a new track in between two existing track segments. Curve the new track out to build the junction. If built correctly, the Railroad Control Switch will appear immediately.
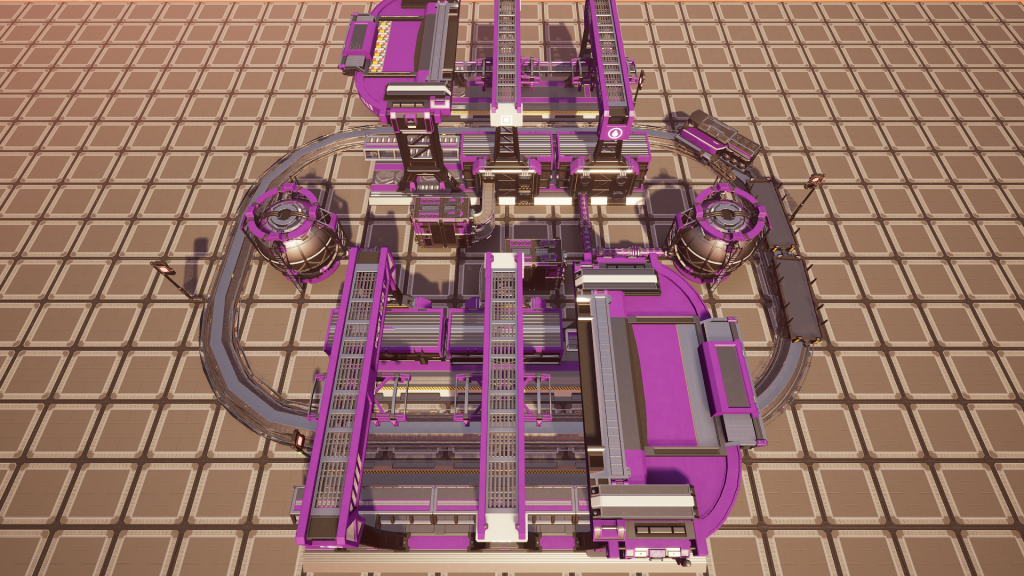
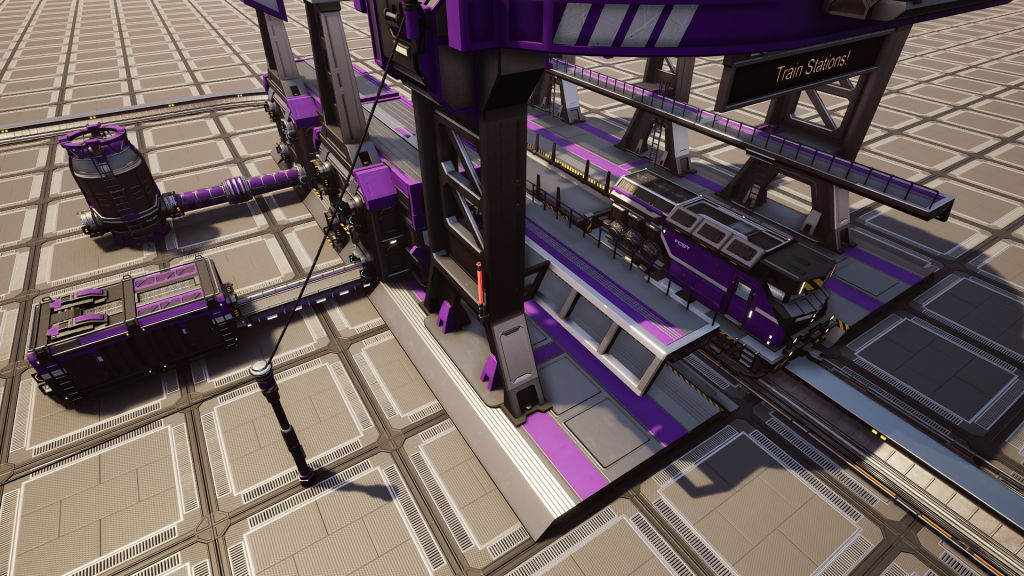
Train Stations
Train Stations determine where materials come from or where they are going. You need a Train Station at every location you want to load or unload materials.
Train Stations interact with the Electric Locomotive of Trains. Locomotives can automatically stop at and dock with stations as part of their Timetable when Auto Pilot is enabled.
Train Stations also allow distribution of Power. Power travels over Train Track as if they were Power Lines. Stations allow you to connect to those tracks using standard Power Lines. Stations connected by track are on the same Power Grid, meaning if one station is supplied with Power, every other station on the line is also connected to that Power Grid.
Train Stations can be named to help remember their purpose when managing locomotive Timetables. You can also paint them with the Customizer.
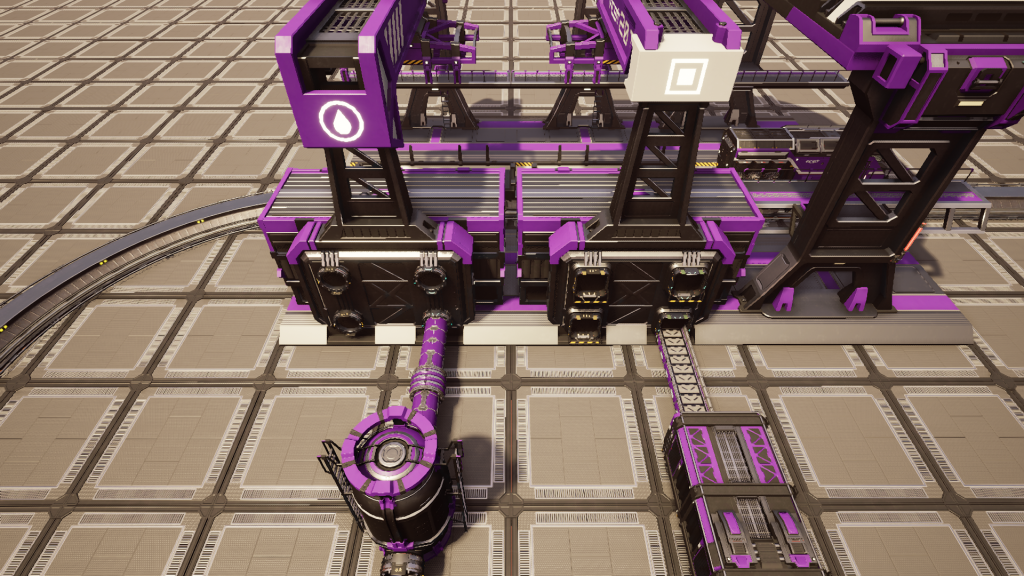
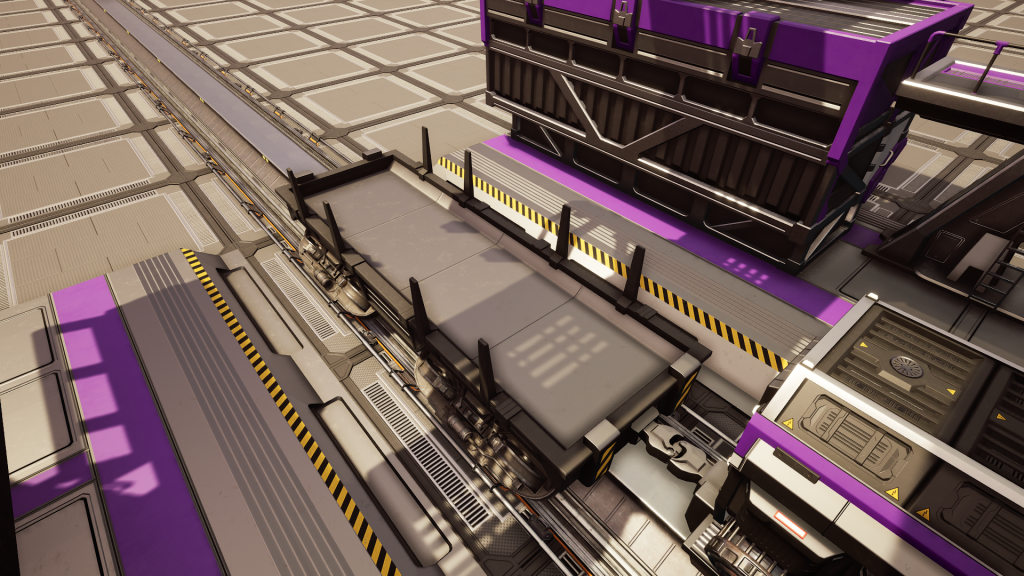
Freight Platforms
Freight Platforms are built connected to Train Stations. They allow the station to interact with the Freight Cars of Trains stopped at their station.
This process is automatically performed when a Train docks with the connected station. An animation is played during this process to visually show progress. The time required to complete a dock (just over 27 seconds) is not effected by the amount of items transferred; it will always take the same amount of time no matter how full the platform or Freight Car is.
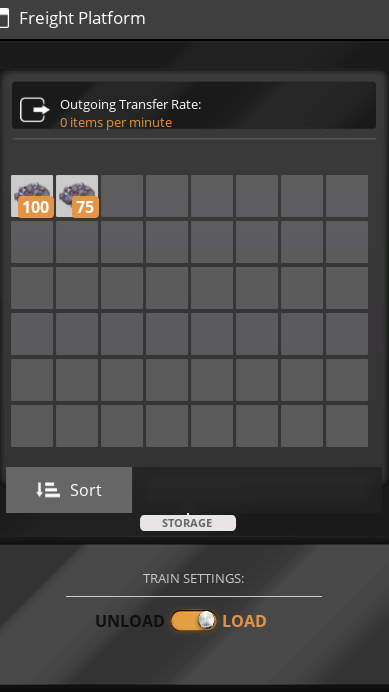
There are two versions of Freight Platforms: Solid and Liquid. Both types have two input and two output slots for their inventory. Solid platforms have connections for Conveyor Belts. Liquid platforms have connections for Pipelines. The output Pipeline connections provide a small amount of Head Lift for the liquids exiting them.
The UI for the Freight Platform allows you to instruct the platform to “Load” into Freight Cars or to “Unload” out of Freight Cars. The assigned process will run once during docking.
While a docking process is active, you cannot interact with the inventory of the Freight Platform or the Freight Car. Also, only during docking will the station use its 50MW Power requirement. While not actively docking, it will drain the minimum 0.1MWs.
Electric Locomotives
Electric Locomotives are the driving force of a Train. They are responsible for moving the Freight Cars between Train Stations.
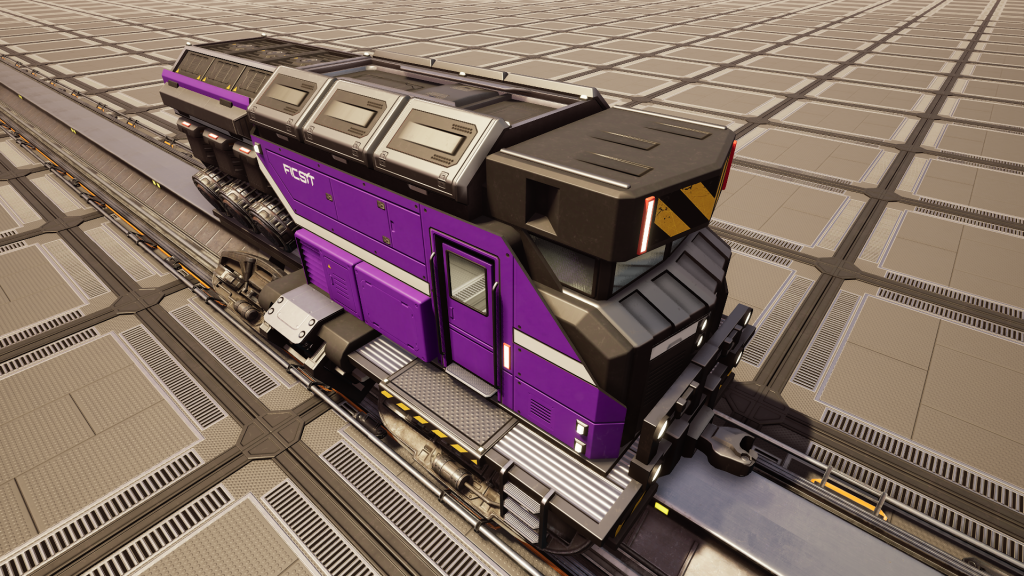
As implied by their name, Electric Locomotives run on Power. They receive this Power from grids connected to a Train Station anywhere along their track. They do not accept any form of fuel.
If unpowered or the Power supplied in insufficient, the locomotive will come to a stop until Power is restored.
Driving
Electric Locomotives can be driven manually. You can enter them by interacting with them, even if they are in motion.
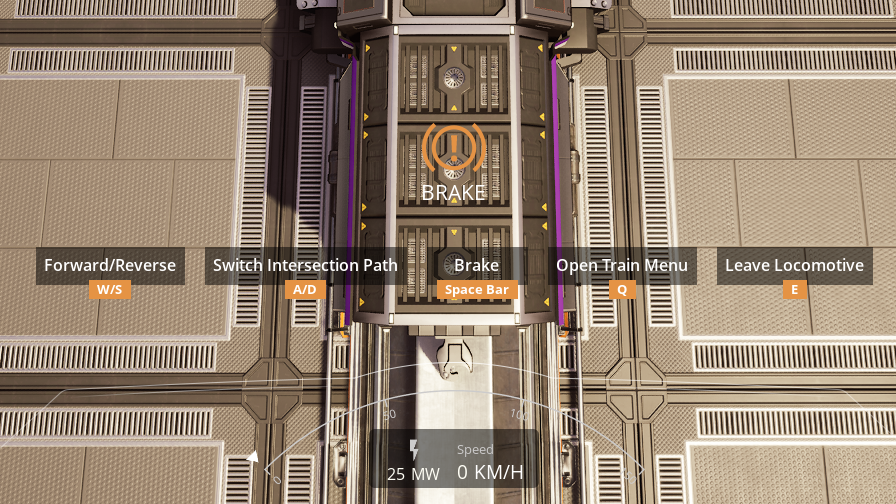
Once inside, you gain multiple options for interacting with your locomotive. You can run the train forward or backward, change an upcoming junction switch, or brake.
The “Train Menu” provides more options focused on automation. You can rename the locomotive, edit the Timetable, and enable or disable Auto Pilot.
The UI will also show you the locomotive’s current Power consumption, speed, the grade of the slope, and if the locomotive is currently breaking or not.
While it is possible to drive your Trains and deliver materials yourself, you can automate the few decisions that need to be made and free yourself up for something more important.
Automating
The Timetable (accessed through the “Train Menu” while inside a locomotive) will allow you to tell your train which stations it needs to go to and in what order. The UI will show you all stations that the locomotive can reach. Stations that the locomotive is not connected to by track will not be shown. Locomotive and Train Station locations will be shown on the Timetable’s map.
Enabling Auto Pilot will allow the train to make decisions on the shortest path to fulfill its Timetable. It will move along track to each Station in the order you tell it to, performing a docking operation when arriving at each station. The locomotive will also determine optimum speeds to minimize travel time when approaching stations or red Signals. It will continue to loop through its Timetable until told otherwise.
Freight Cars
Freight Cars are responsible for holding the materials you wish to transport. They allow the Train to interact with a Train Station’s Freight Platforms. When a Train docks with a station, the Freight Car will be either loaded or unloaded by the Freight Station it is parked at.
Freight Platforms set to “Load” will load their stored materials into the docked Freight Car. Freight Platforms set to “Unload” will take the materials from the docked Freight Car.
During the dock animation (just over 27 seconds), the inventory of the Freight Car is inaccessible. While not docking, you can interact with a Freight Car as if it were a Storage Container (even while in motion).
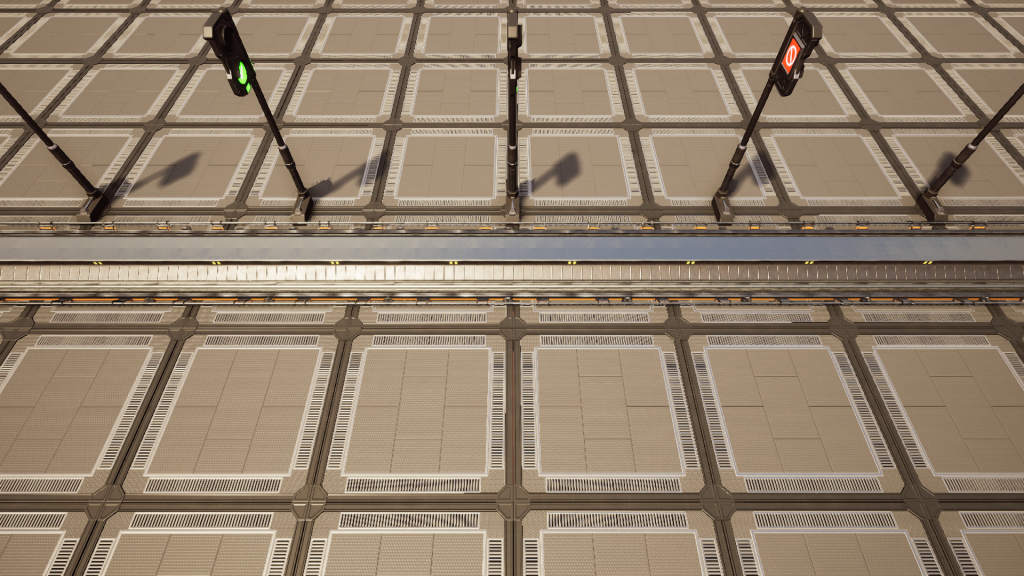
Signaling
Signaling may seem complicated at first, but once it clicks, you will be safely managing multiple Trains on the same line in no time.
A complete train line is a collection of track segments. Each time you build track, you add another segment to the overall line. The connection point between each of these segments allows for the construction of Signals. A signal can face either direction, meaning up to two can be built at the connection point between segments (one in either direction).
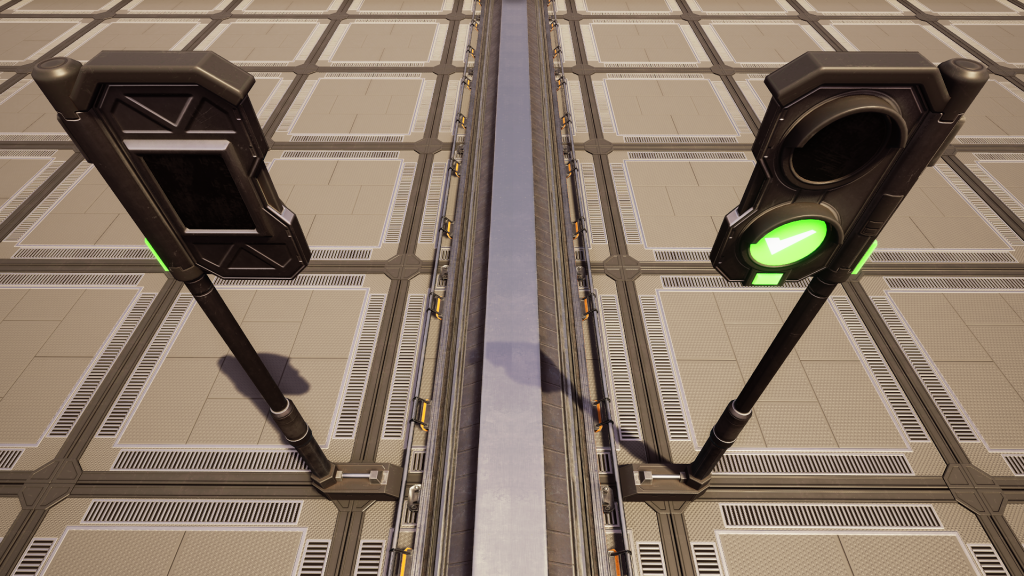
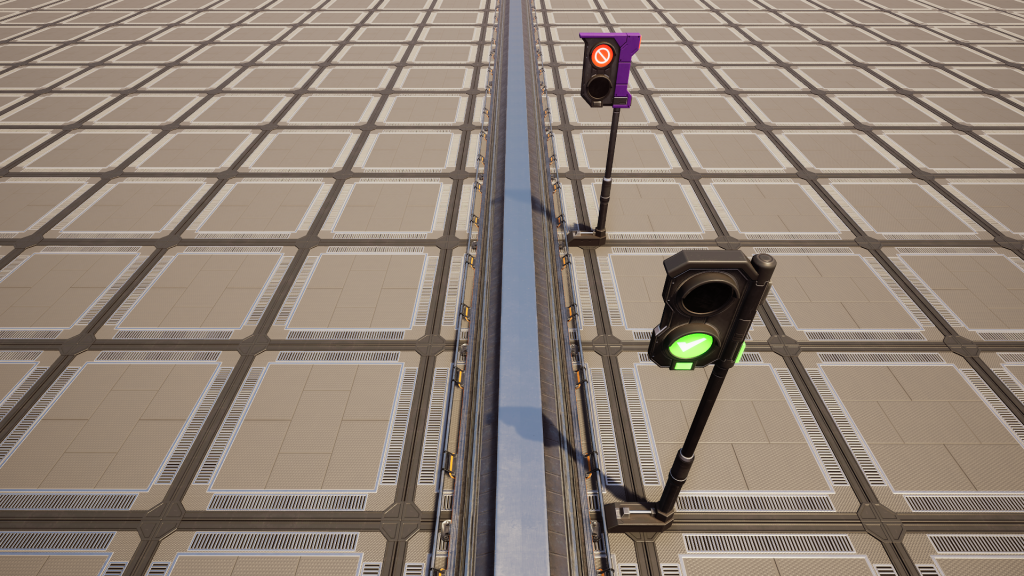
When driving a car on a road and approaching an intersection, the driver of the car looks at the traffic lights to determine if they are allowed to go through the intersection or not. Train Signals act the same way. Red lights tell the Train to stop while green lights allow the train to pass.
These lights are shown by the Signal facing the approaching Train. Like a car intersection, the Train only obeys the one Signal that is facing it. The relevant Signal will always be on the right side of the track from the perspective of the approaching Train.
Signals can also flash yellow, indicating that the track ends ahead, is incomplete, or has conflicting Signals.
Block Signals
The term “block” can be confusing here. A “block” is another name for a group of one or more track segments. A Block Signal allows or disallows entry into the upcoming block.
Do not think of the Block Signal as “blocking” entry, rather that it is allowing or disallowing entry to the block (one or more track segments).
In addition to allowing or disallowing entry, a Block Signal is also used to define blocks. Placing a Block Signal will define the starting point of the block. Placing a second further down the line will complete the definition of the block (and start a new block). All track segments between the starting Signal and the next Signal will be considered one block.
Remember that Signals can be placed in either direction of the track. A Block Signal will follow the track to the next Block Signal along the train line in the direction it was built when defining its block.
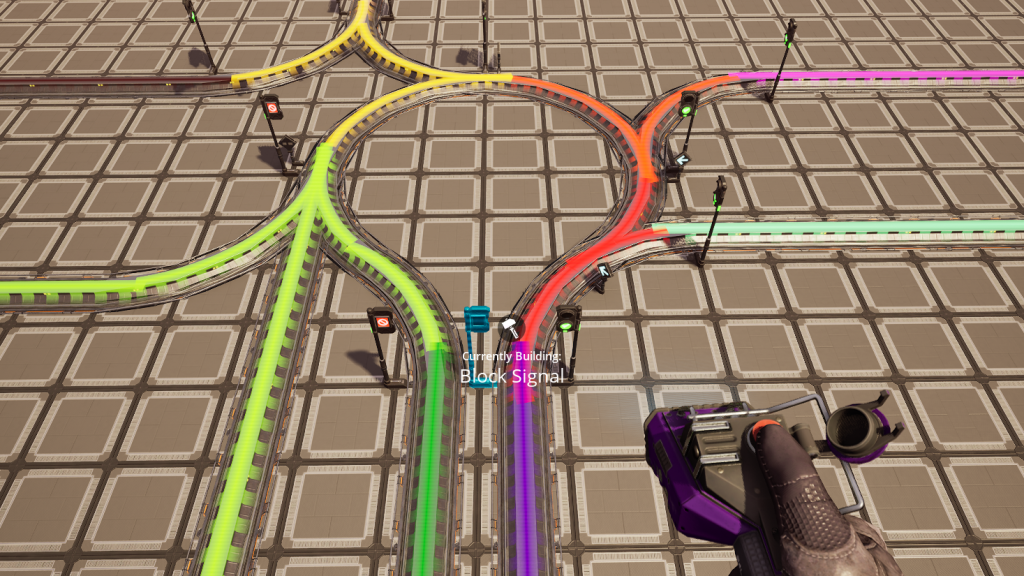
The game shows different blocks as different colors when construction Signals. You can use this to determine what blocks you have defined on your line.
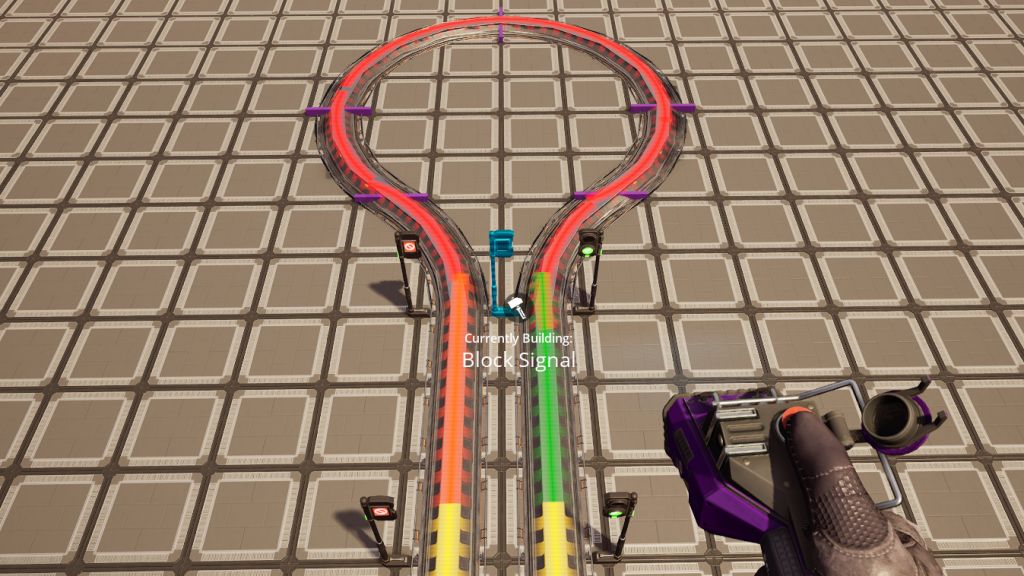
Junctions (two or more lines crossing or merging) make blocks harder to build. When working with junctions, all valid paths in or out of the junction up until the next Signal become part of the block. When in doubt, look at the colors as you are placing your Signals.
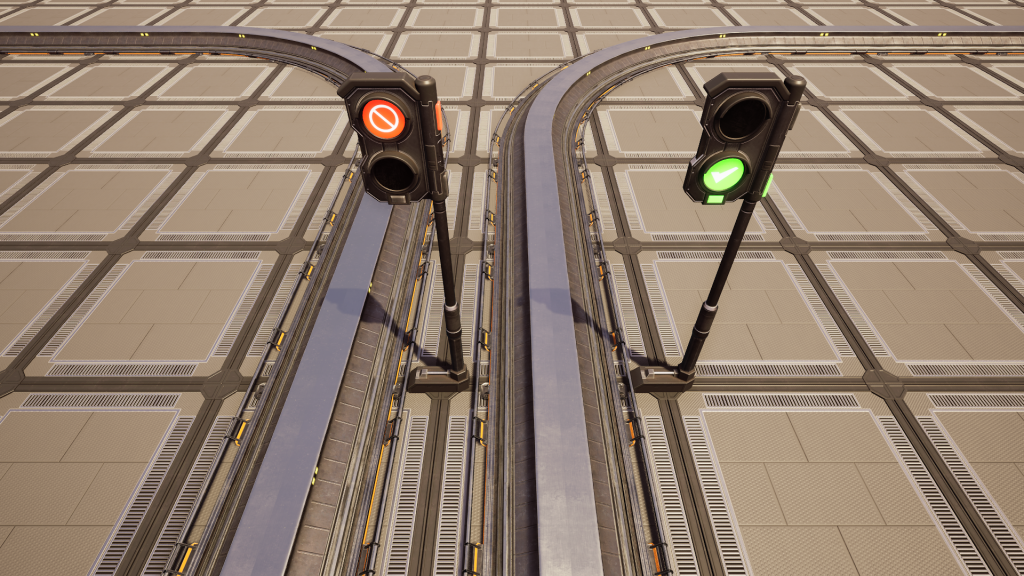
Once its block is defined, a Block Signal will determine what color (red or green) it is displaying based on only one question: is there at least one Train currently in my block? If there is a Train even partially within its block, it will show red. If there are no Trains, the Block Signal will show green.
Trains approaching a red light will stop at the Signal, waiting for it to turn green. Once green, the block is now safe and the train can continue. Upon entering the block, the Signal will detect that the Train is in its block, turning red for any other approaching Trains until the block is clear again.
Path Signals
Path Signals are a more advanced version of Block Signals. They can mostly be ignored in all but the most complicated Train systems. Be sure to understand Block Signals before diving into Path Signals.
They are used in track junctions, but generally to optimize the junction rather than enable it; you can do almost everything with just Block Signals, it may just be a bit slower.
Path Signals, similar to Block Signals, show either green or red, allowing or disallowing entry for incoming Trains. However, unlike Block Signals, the color is determined by the incoming Train’s “path,” not the overall block.
Remember that a block is a collection of track segments. A “path” is a smaller subdivision of those segments within a single block. Think of a path as one single route an incoming Train could take through a block.
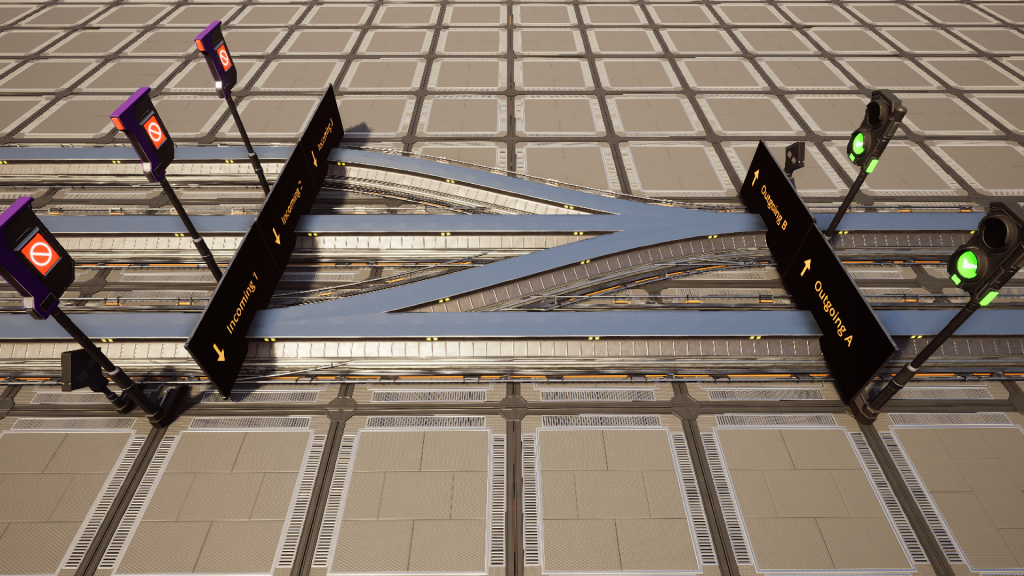
The single block pictured above has four paths (when entering the block from the left):
- 1A – Incoming 1 to Outgoing A
- 1B – Incoming 1 to Outgoing B
- 2B – Incoming 2 to Outgoing B
- 3B – Incoming 3 to Outgoing B
A block can be be comprised of anywhere between one and infinite paths, depending on the complexity of the junction. Any individual track segment can be part of multiple paths.
When a train approaches a Path Signal, it pre-determines which path it will take through the block (based on the shortest route to its next scheduled Train Station).
This intended path is told to the Path Signal. If none of track segments of that path are already reserved, the Path Signal will reserve the path (and all included track segments) and show green to the requesting train.
If any track segment that the incoming train is requesting have already been reserved by a different train, the signal will show red until the conflicting segments are no longer reserved.
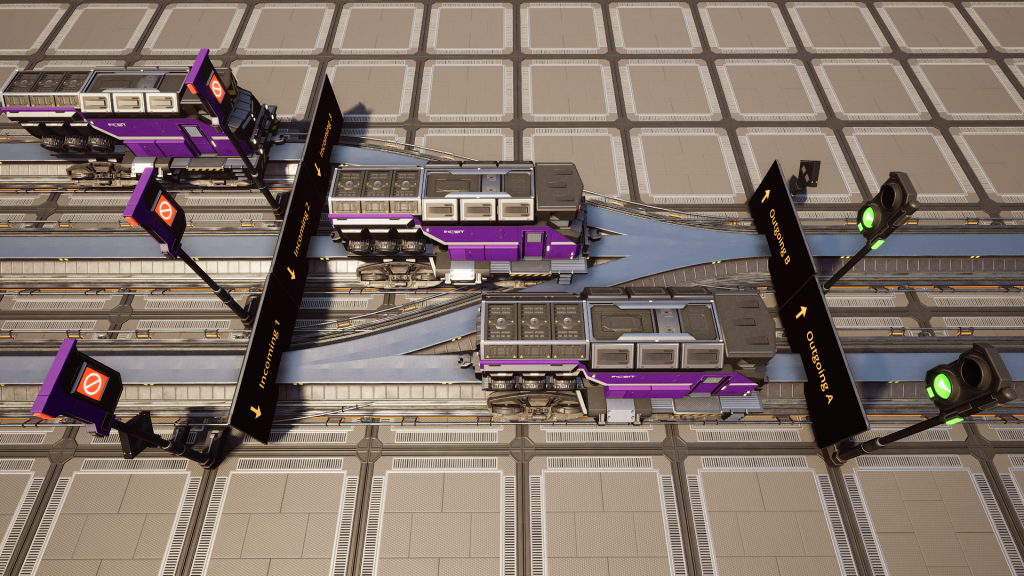
-
The bottom train reserved all segments from Incoming 1 to Outgoing A
- The bottom train was the first to request a path through the block
- With no other reservations, the bottom train was shown green
-
The middle train reserved all segments from Incoming 2 to Outgoing B
- None of these track segments were part of the 1A reservation
- With no CONFLICTING reservations, the middle train was shown green
-
The top train tried to reserve all segments from Incoming 3 to Outgoing B
- One or more of these segments is currently reserved by the middle train
- Because there is a conflicting reservation, the top train is shown red
- The top Path Signal will show green when the middle train leaves the block, releasing its reservations
Once a Train has entered the block, its intended path reservation is known by all Path Signals managing the block (including the Signal that allowed the Train in). All track segments in that path are reserved for that Train until it has left the block.
Path Signals will also show red if the next Block Signal (down the path the incoming Train is planning to follow) is red. This means that the block AFTER the Path Signal’s block must also be empty.
When using a mix of Path Signal and Block Signals to manage entry to a single block, Block Signals will still show red if a Train is anywhere in the block, regardless of its path.
Finally, one last intricacy: a Train will only send a path reservation request to a Path Signal when that Path Signal is the Train’s NEXT signal. Until the Path Signal has approved the path, the Train will consider the Signal red. This means if you have a Block Signal right before a Path Signal, the Train will ALWAYS slow to be able to stop at the ‘red’ Path Signal, regardless of if its path is empty or not.
When set up correctly, Path Signals allow multiple Trains to be in the same block as long as they are using different paths.